How NotebookLM Source Labels Work (and How to Manage Them in a Table)
Enhance your NotebookLM experience with our free browser extension.
View plans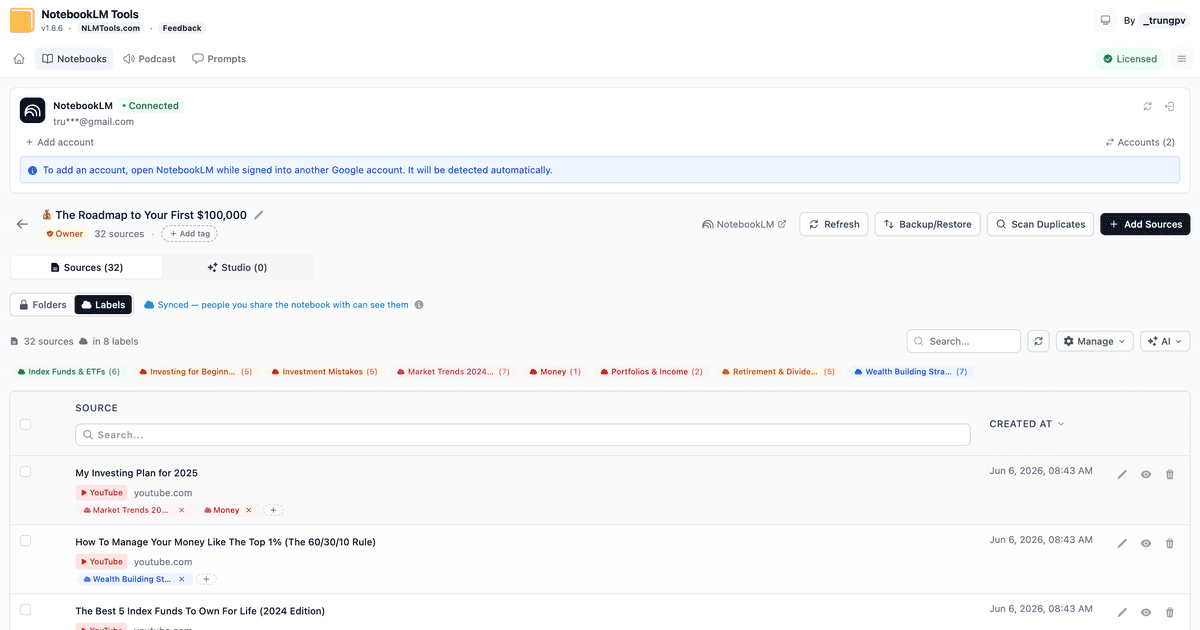
Short answer: NotebookLM now labels your sources for you. Once a notebook has five or more sources, it reads each one, groups the related ones, and shows the labels in the sidebar. The NotebookLM Tools extension surfaces those same labels in a table — so you can make your own labels, add or remove them on each row, tag sources in bulk, and filter or search instead of hunting through the sidebar.
NotebookLM's automatic labels are a real upgrade for big notebooks. But once you pass ~15 sources, the actual managing — reassigning, cleaning up, finding everything under one label — in that narrow sidebar gets slow. A table makes it quick.
In this guide: how NotebookLM's source labels work, how they differ from folders and tags, and how to manage them in a table view.
What are NotebookLM source labels?
Source labels are NotebookLM's built-in way to organize sources. They turn on automatically once a notebook has five or more sources. NotebookLM reads the content of each source, groups the related ones, and gives each group a label that shows up as a tag in the sidebar.
A few things worth knowing:
- They're automatic. NotebookLM proposes them from your content, so you don't have to set them up. A source that covers more than one topic can get more than one label.
- You stay in control. You can rename a label, reassign a source, add an emoji, or leave a source unlabeled.
- They help the AI focus. You can turn label groups on and off in chat, so the model only looks at the sources you care about right now.
- They're part of the notebook. Anyone you share the notebook with sees the same labels.
Labels make big notebooks — the kind with dozens of sources — far more manageable, with structure you didn't have to build by hand.
Labels do more than tidy up — they steer the AI
The real payoff of labels isn't a neater sidebar — it's control over what the AI looks at. In NotebookLM you can toggle a label group on or off during a chat, so the model grounds its answers only in the sources you've activated. Working on methodology? Turn on just that label and everything else — along with the noise — drops out of the conversation.
That makes your chat answers and Studio outputs sharper: with one label active, they draw only from those sources. Because the chat is now scoped to that label, you can even ask it what's missing from the cluster — a quick way to spot gaps before you write.
A table view helps here too. It's far faster to see what's in each label, and to fix anything mislabeled, when every source and its labels sit in front of you at once.
Labels vs. folders vs. tags
These are easy to mix up, so here's the quick version:
- Labels are NotebookLM's own feature. They're AI-suggested, attached to the notebook, and shared with anyone you collaborate with.
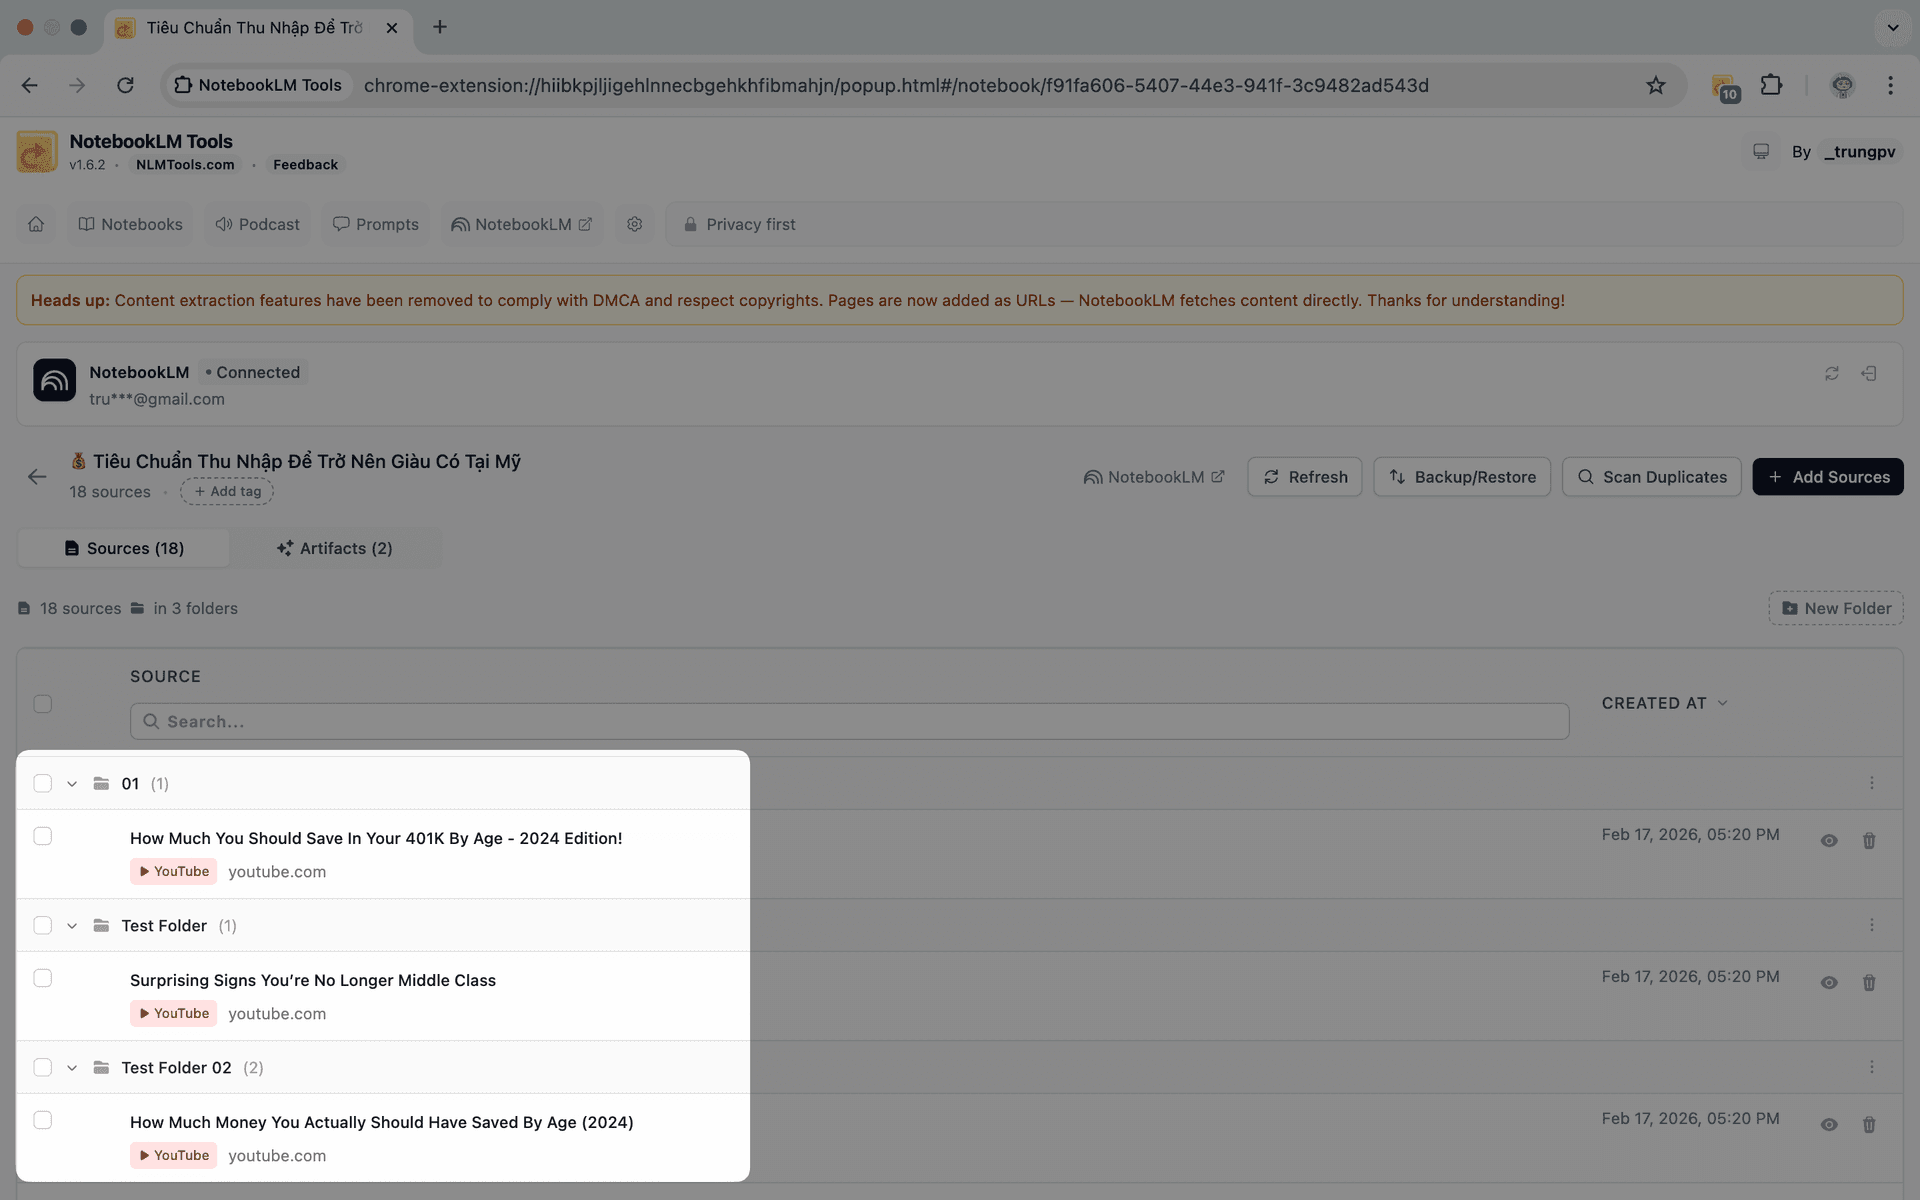
- Folders are a NotebookLM Tools feature. You create them yourself and drag sources in — your private structure, great when you want full control over your own categories. See the folders guide.
- Tags work at the notebook level — for organizing your list of notebooks, not the sources inside one. See Organizing Notebooks.
Short version: use labels for shared, content-based organization; use folders for a private structure you control. They work fine side by side.
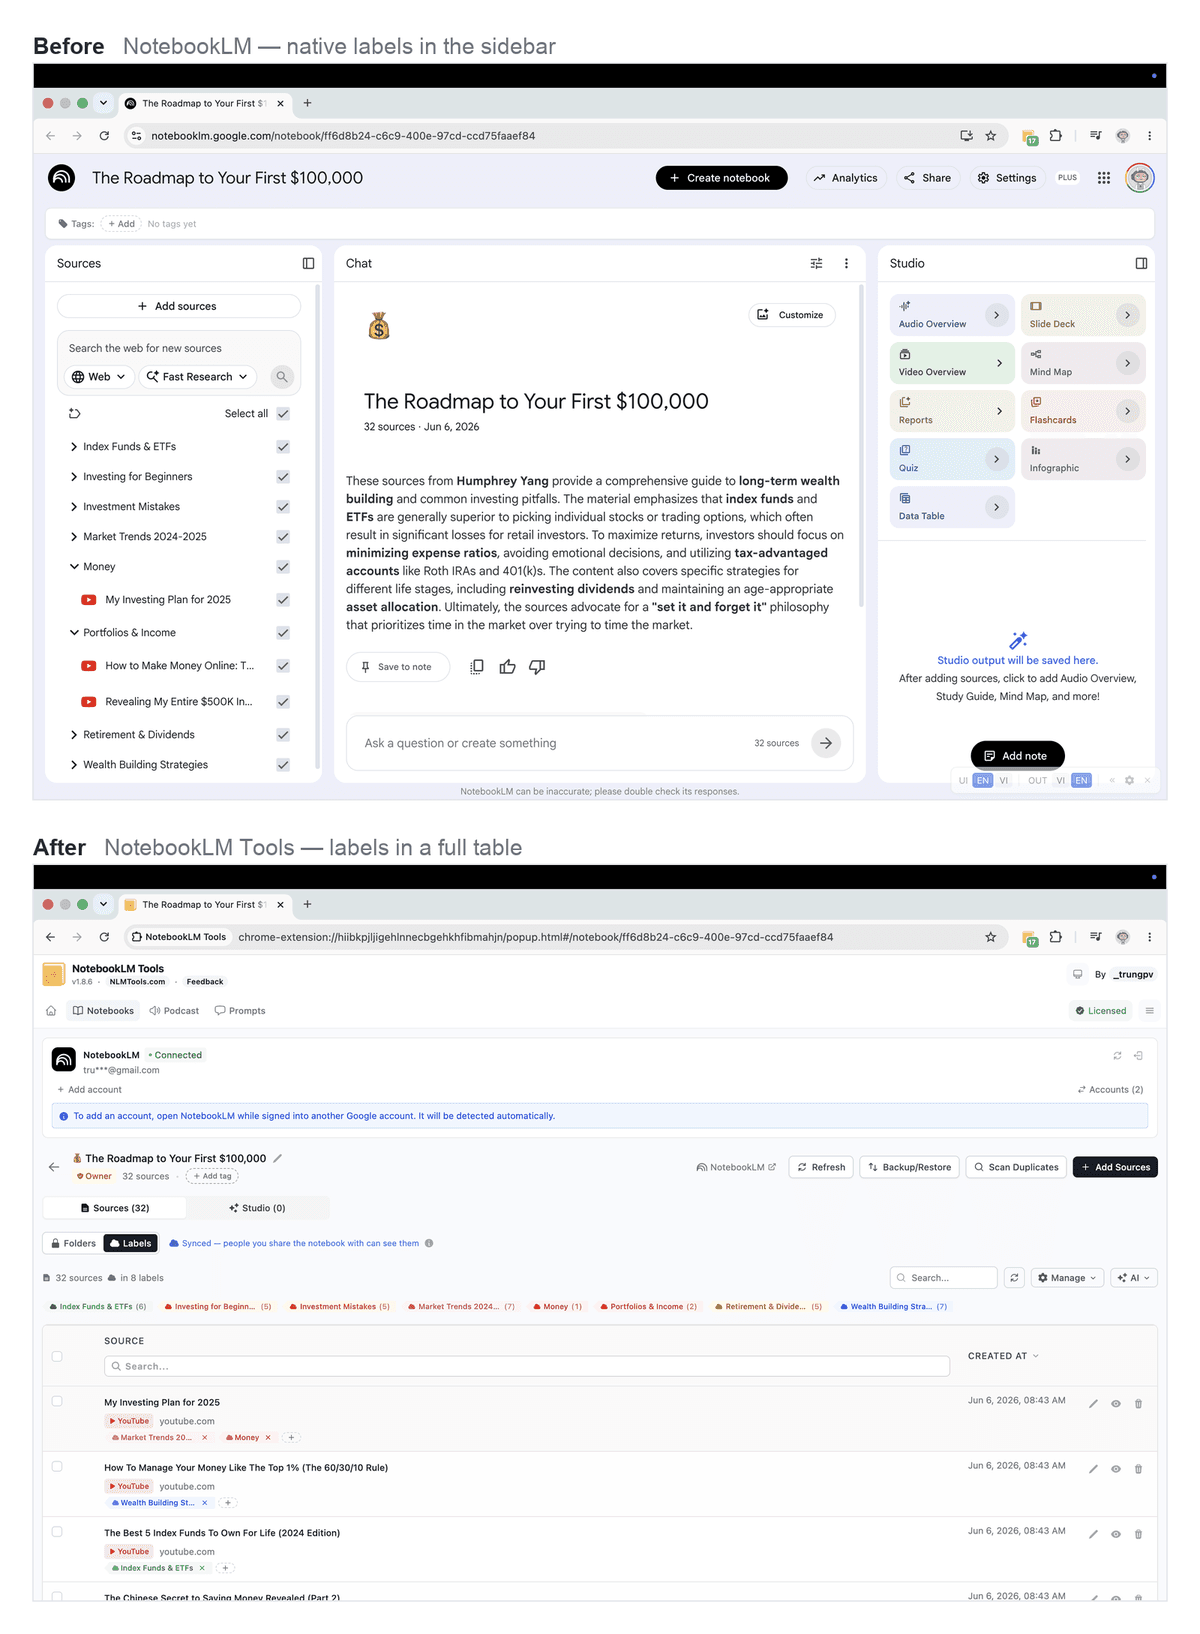
Where the sidebar view falls short
The native labels live in the source sidebar, which is fine at first. As a notebook grows, a few things get tedious:
- It's a narrow tree. Scanning and reassigning across 30–40 sources means a lot of scrolling.
- No bulk actions. Re-tagging or cleaning up a batch of sources happens one at a time.
- Hard to see the whole picture. There's no wide table to scan every source, its labels, and counts at once.
- It's one notebook at a time. You work inside the sidebar of whichever notebook is open.
None of this means the feature is bad — it just wasn't built for managing labels at scale. That's where a table helps.
Manage your labels in a table with NotebookLM Tools
NotebookLM Tools adds a Labels tab that shows every source in your notebook as a row in a table, with its labels right there. Same native labels — a better surface to work on.
Create and assign labels yourself
Add a label to any source with the + on its row, or type a new name to create a label and assign whatever sources you want — all from the table, without hunting through the sidebar.
Add or remove labels inline
Each row shows the source's labels as chips. Add with +, remove with × — no digging through menus.
Tag in bulk
Select a group of sources and move, rename, or merge their labels in one action. Cleaning up a messy notebook takes seconds instead of minutes.
Filter, search, and sort
- Filter by label and see how many sources each one holds. Pick several to see anything in any of them, or filter to Untagged to find stragglers.
- Search sources by title and spot source types (YouTube, article, and so on) at a glance.
- Sort by date to see what you added recently.
Still native, still synced
These are NotebookLM's own labels the whole time. Anything you change in the table syncs back, so collaborators see the same structure. And if you ever want NotebookLM to (re)label for you, there's a button to do it on demand — only when you click it.
How to organize NotebookLM sources by label (step by step)
Step 1: Install NotebookLM Tools
Install NotebookLM Tools from the Chrome Web Store or Firefox Add-ons. It works on Chrome, Edge, Brave, Arc, Opera, and Firefox.
Step 2: Open a notebook with 5+ sources
Open a notebook that has at least five sources — that's the point where NotebookLM generates labels automatically.
Step 3: Open the Labels table
In the side panel, switch to the Labels tab. Every source appears as a row with its labels.
Step 4: Make labels your own
Add labels on each row, create your own labels for the categories that matter to you, and reassign anything the AI didn't get quite right.
Step 5: Filter and bulk-tag to stay organized
Filter by label, search by title, and select multiple sources to tag them together. A few minutes here keeps a 40-source notebook easy to navigate.
Workflow tips
Use labels to focus the AI. Toggle a label group on in chat to point the model at one topic — handy for focused answers or studio artifacts built from just those sources.
Pair labels with folders. Labels are shared; folders are private. Use labels for the team view and folders for your own working structure.
Re-label after big imports. Added a batch of sources? Check the table and tag the new ones so nothing gets stuck in Untagged.
Keep names short and consistent. Short label names read better in both the sidebar and the table.
Frequently Asked Questions
When do labels appear in NotebookLM?
Once a notebook has five or more sources. Below that, NotebookLM doesn't generate labels.
Are NotebookLM labels shared with people I collaborate with?
Yes. Labels are part of the notebook, so anyone you share it with sees the same labels.
Can I create my own labels?
Yes. NotebookLM auto-suggests labels from your content, and you can add or rename labels yourself too. NotebookLM Tools makes it quicker — create a label and assign any sources to it right from the table.
What's the difference between labels and folders?
Labels are NotebookLM's native, shared organization. Folders are a NotebookLM Tools feature for your own private grouping by drag-and-drop. Use whichever fits — or both.
Does this work on free NotebookLM?
Yes. NotebookLM's labels are available to everyone, and NotebookLM Tools is free to try.
Will NotebookLM Tools change my labels?
It works on the same native labels. Edits you make in the table sync back to NotebookLM — nothing separate or hidden.
Spend less time managing, more time researching
NotebookLM's source labels bring real structure to big notebooks. A table view makes that structure fast to work with — your own labels, bulk edits, and quick filtering, all on the labels NotebookLM already made.
Install NotebookLM Tools to manage your labels in a table. See the full feature list, or learn about source folders for private grouping.
Related articles:
- How to Organize NotebookLM Sources with Folders — Build your own drag-and-drop structure.
- How to Organize NotebookLM Notebooks with Tags, Search & Dashboard — Foundational organization tips.
- How to Auto-Update & Refresh NotebookLM Sources in Bulk — Detect stale sources and sync them.
Trusted by 90,000+ NotebookLM users
Related articles
Can You Create Folders in NotebookLM? Yes — Here's How (2026)
NotebookLM has no built-in folders, but you can add them in seconds. Create up to 50 drag-and-drop source folders per notebook with a free Chrome extension.

How to Merge Sources in NotebookLM (Combine Duplicates & Fragments)
Merge related sources inside a NotebookLM notebook to cut duplication and give the AI cleaner context. Preview before you commit — free Chrome extension.
How to Organize NotebookLM Notebooks with Tags, Search & Dashboard
Drowning in notebooks? Organize your NotebookLM workspace with tags, instant search, and a unified dashboard — a free workflow that scales past 50 notebooks.