NotebookLM Tags vs Collections: Which to Use (+ 1-Click Convert)
Enhance your NotebookLM experience with our free browser extension.
View plansThis post is part of the NotebookLM tips & workflow series, where I share practical ways to work more efficiently with Google NotebookLM (now Gemini Notebook) — especially when your projects grow beyond just a few notebooks.
For a long time, the answer to "how do I organize my notebooks?" was the extension's tags — a fast, color-coded layer that lives in your browser. Now NotebookLM has a native answer too: Collections, which group whole notebooks and sync to your Google account.
So which one should you use? And what happens to the tag system you already built?
This post answers both — including the one-click converter that copies your tags into collections without deleting anything.
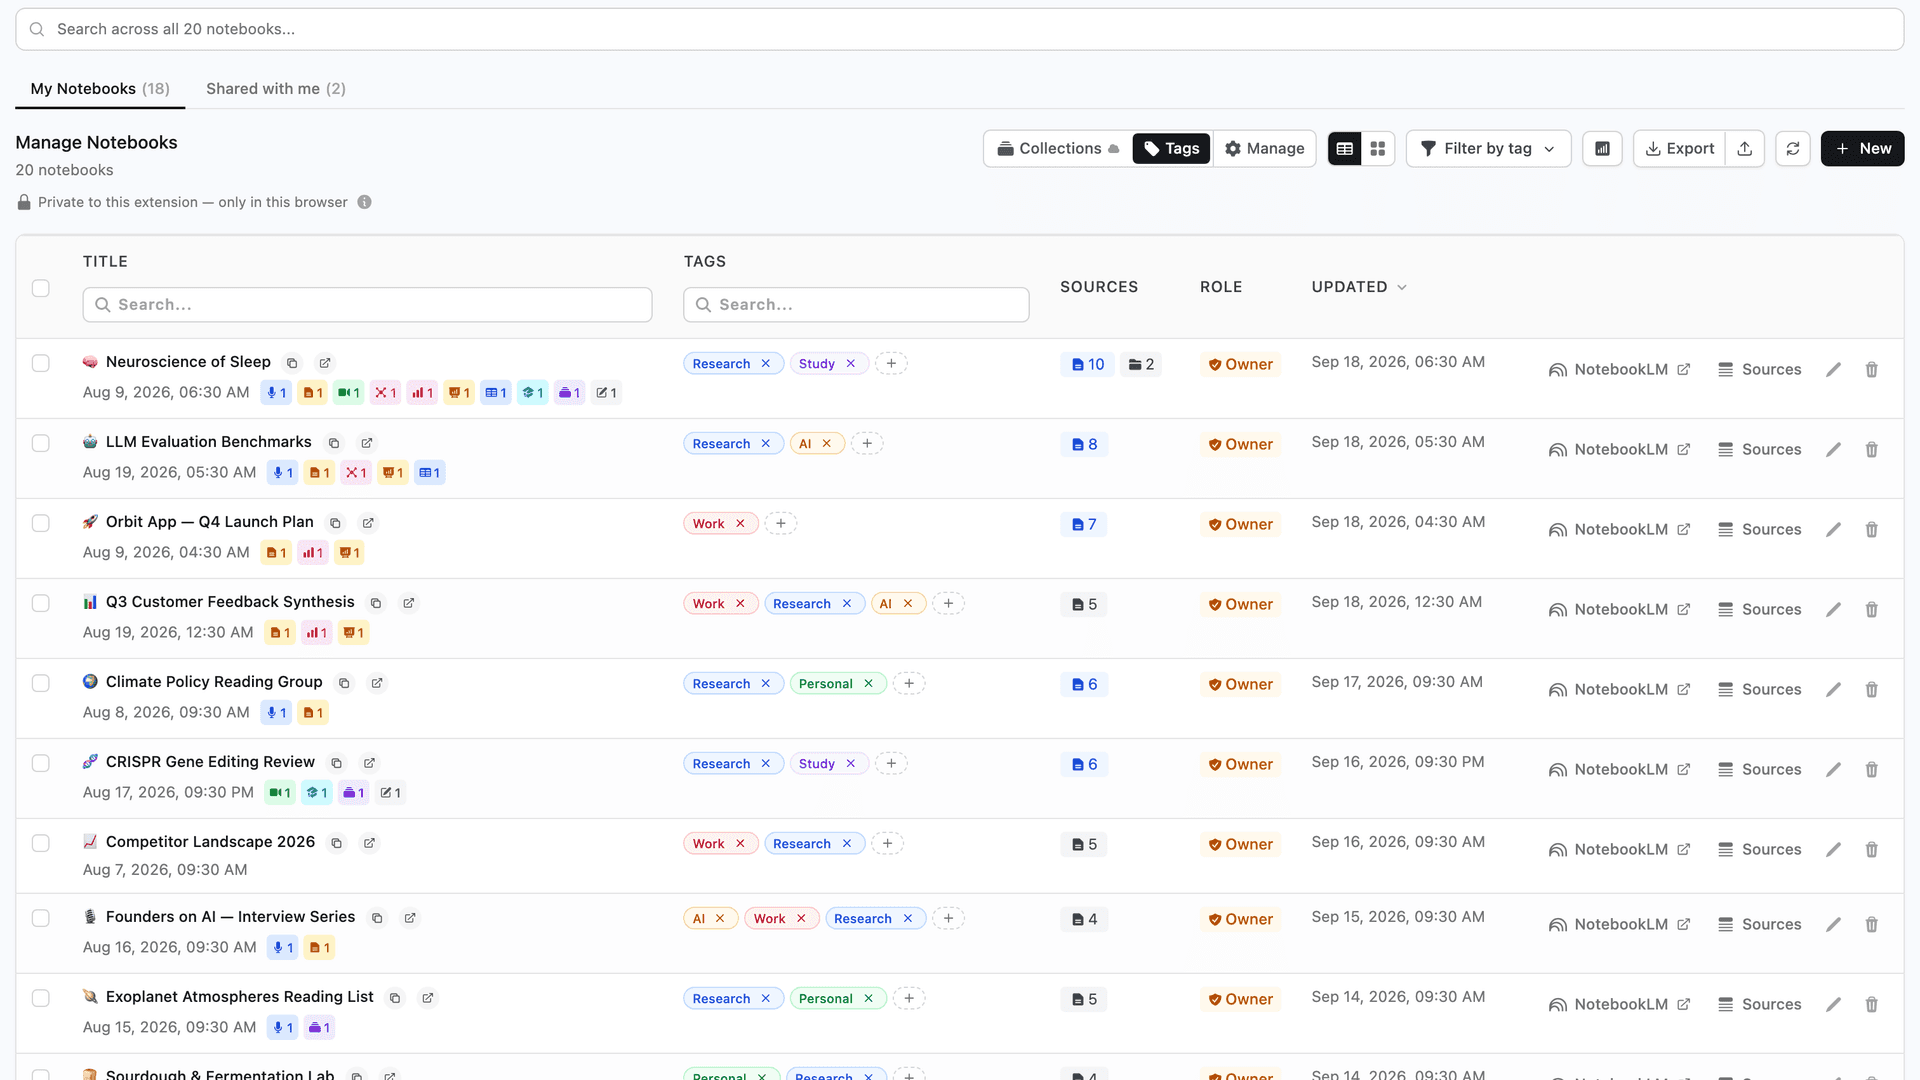
Two Ways to Group Notebooks: Tags and Collections
Both features solve the same core problem — a homepage that has become an endless wall of notebook cards — but they solve it from different directions:
- Tags are a feature of the NotebookLM Tools extension. They live in your browser, carry one of 10 colors, and are completely private: nobody else can see them, and NotebookLM itself doesn't know they exist.
- Collections are NotebookLM's own feature. Each collection has a name and an optional emoji, groups entire notebooks, and is stored in your Google account — visible on notebook.google.com from any device, even with no extension installed.
The two aren't rivals. A notebook can carry tags and belong to collections at the same time, and the extension manages both from the same dashboard. For a full walkthrough of collections themselves — creating, bulk-assigning, filtering — see the complete collections guide.
Tags vs Collections at a Glance
| Tags | Collections | |
|---|---|---|
| Provided by | NotebookLM Tools extension | NotebookLM (native) |
| Where they live | Your browser only | Your Google account |
| Visible on notebook.google.com | Only in this browser, as chips the extension adds | Yes, on every device, even without the extension |
| Visual marker | 10 colors | Name + optional emoji |
| A notebook in several groups | Yes | Yes |
| If you remove the extension | May be lost — they live in extension storage | Still there — native NotebookLM data |
| Best for | Private, color-coded workflow states | Durable project structure that follows your account |
(Wondering about source folders and labels too? Those organize the sources inside one notebook — the collections guide has the full four-way comparison.)
Which Should You Use?
Use tags when privacy and speed matter most
Tags shine as a personal working layer:
- They need no account connection and never leave your browser.
- Colors make states like to review, active, or archive readable at a glance.
- Creating and assigning them is instant — no sync round-trip.
If your organization is really a private workflow — flags only you care about — tags remain the right tool.
Use collections for structure you want to keep
Collections are the better home for durable project structure:
- They're native NotebookLM data: synced to your Google account, visible on notebook.google.com, intact even if you switch browsers or uninstall every extension.
- They group by project, course, or client — the shape your library actually has.
- A notebook can sit in several collections at once, so "Thesis" and "To Review" don't compete.
Or use both
The pattern that works best in practice: collections for structure, tags for state. File every notebook into a project collection, then layer private tags like active or archive on top. The dashboard filters by either one.
What the One-Click Converter Does (and Never Does)
If you've already built a tag system, you don't have to rebuild it as collections by hand. On the extension's Tags page, the Convert to Collections button turns each selected tag into a native collection containing the same notebooks.
What it does:
- Copies, never moves. The conversion is one-way and non-destructive — the dialog says it plainly: "Tags are kept — this copies them."
- Maps colors to emoji. Collections have no colors, so each tag's color becomes a suggested emoji — red → 🔴, green → 🟢, blue → 🔵 — editable per tag before you run.
- Skips duplicates. A tag whose name already exists as a collection (matching ignores case) is skipped untouched, so re-running the converter is always safe.
- Reports everything. It runs one tag at a time and ends with a summary — created, skipped, failed — plus the reassurance that matters: "Your tags are unchanged."
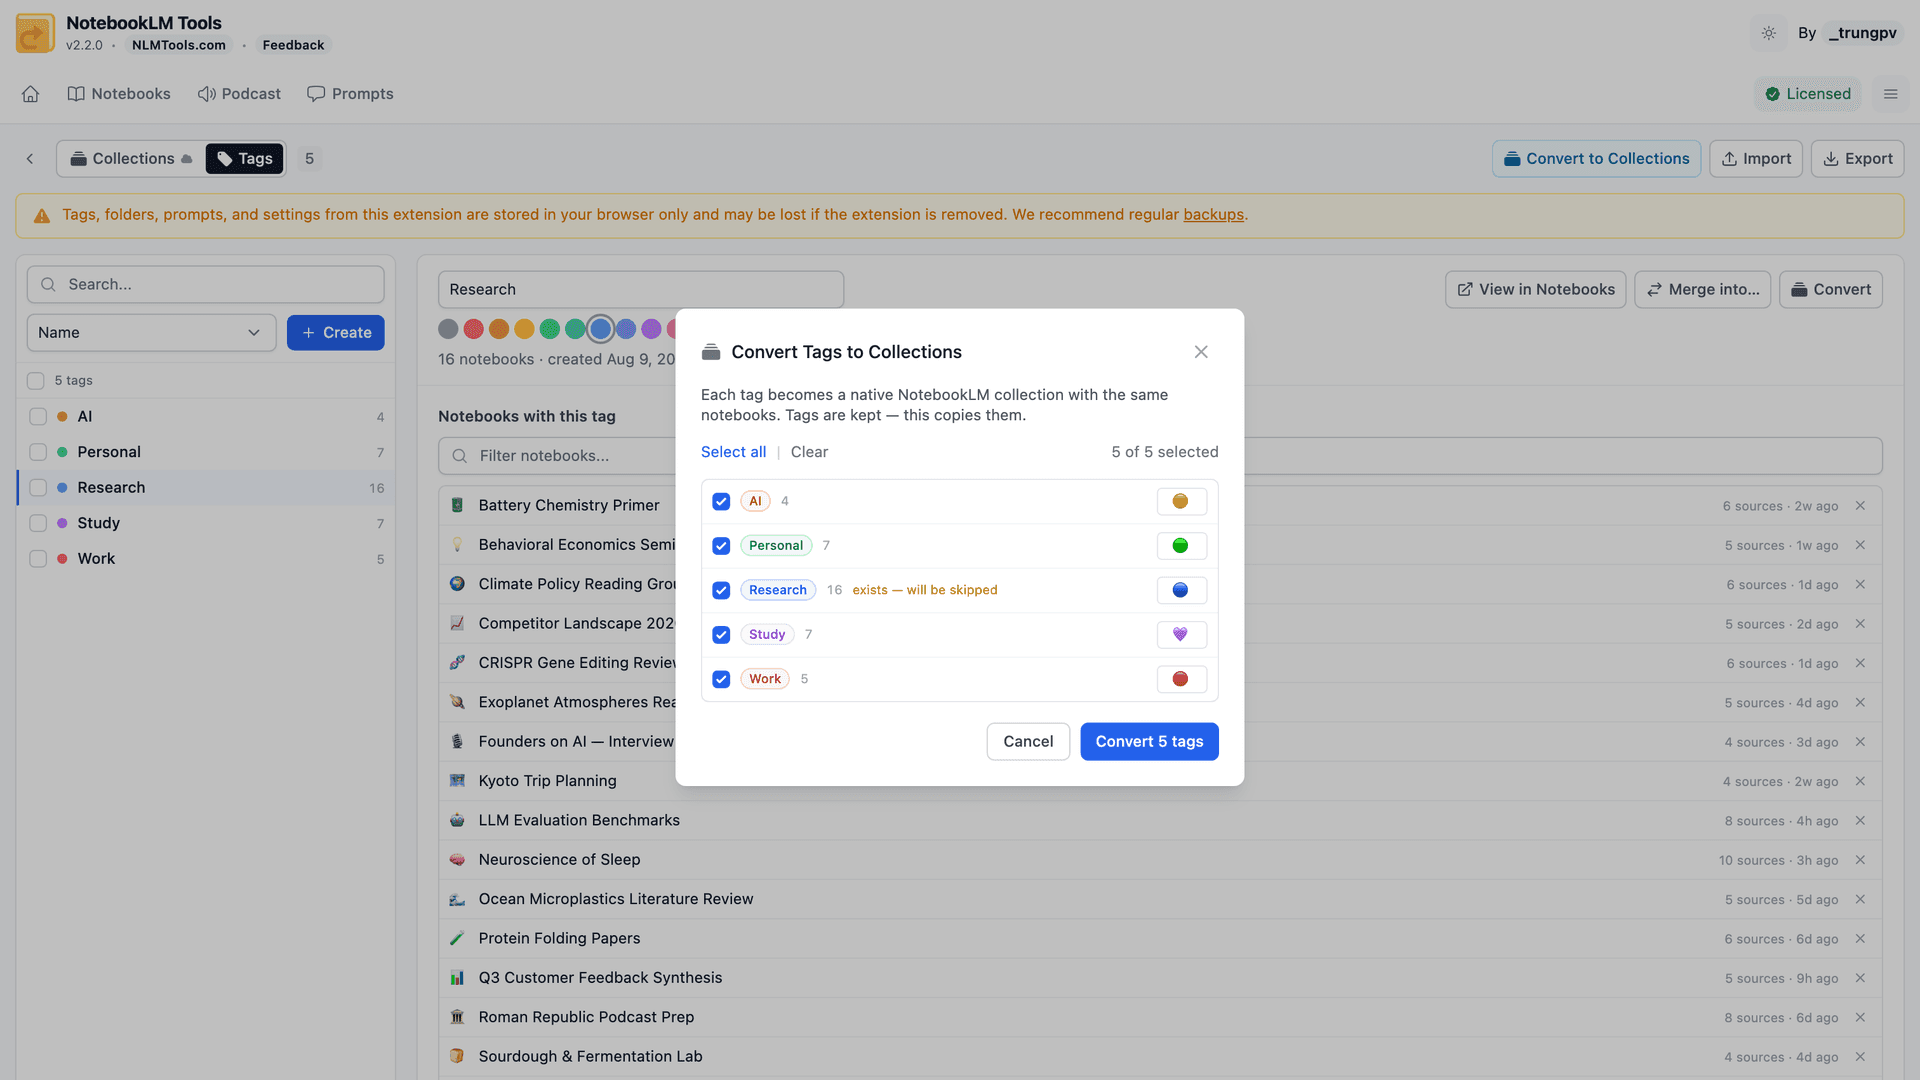
The practical payoff: the structure you built in one browser becomes part of your Google account — visible everywhere, with nothing lost if you ever change machines.
How to Convert Tags to Collections (Step by Step)
Step 1: Open the Tags page
On the NotebookLM Tools Notebooks page, select Tags and click Manage next to it to open the Tags page. Connect your NotebookLM account if you haven't — collections are written to that account, and the convert button stays disabled until you do.
Step 2: Click "Convert to Collections"
The header button converts all tags at once. Prefer a subset? Select specific tags first and use the Convert action for just those.
Step 3: Review the suggested emoji
Each tag shows a suggested emoji derived from its color. Edit or clear any of them — this is your one chance to shape how the new collections will look before they're created.
Step 4: Check the duplicate warnings
Tags marked "exists — will be skipped" already have a same-name collection. They'll be left alone — nothing merges or overwrites.
Step 5: Run the conversion
Confirm and keep the panel open. The converter processes one tag at a time and shows progress as it goes.
Step 6: Review the summary
The result screen counts created, skipped, and failed conversions — and confirms your tags are unchanged. View Collections takes you straight to the result.
The Dashboard: See Everything in One Place
The comparison above only matters if you can actually see your structure — and that's what the extension's notebook dashboard is for.
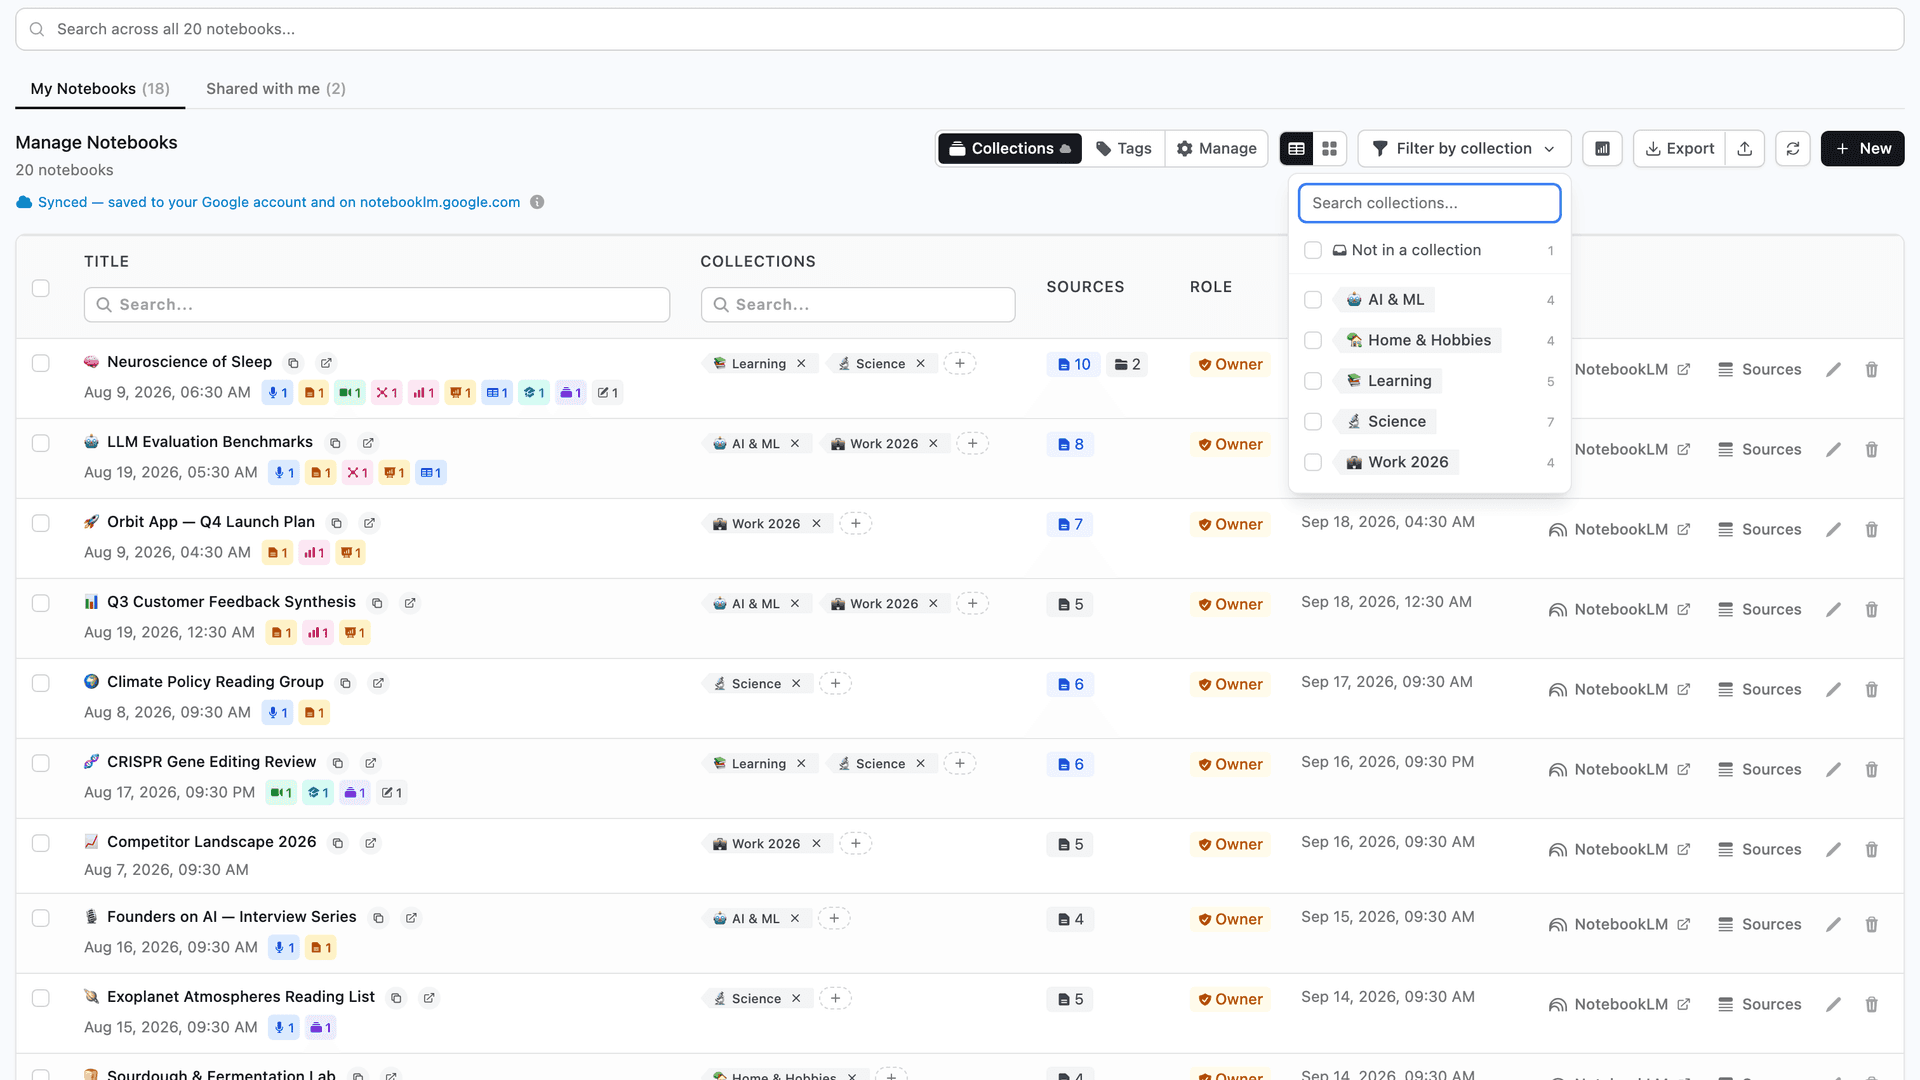
All your notebooks appear together in table view or card view, with their tags, collections, and source counts visible at a glance. From there:
- Real-time search filters notebooks instantly as you type — by title or tag, no page reload.
- Collection filters narrow the list to one or several collections, or to only the notebooks you haven't filed into any collection yet.
- Direct source access opens any notebook's source list without opening the notebook itself — handy for cleanups and audits.
If you prefer seeing this in action, I've recorded a full video walkthrough of collections and source labels — including the tags-vs-collections comparison and the one-click converter:
Best Practices for an Organized Workspace
These patterns come up again and again among power users — they apply whether you have 10 notebooks or 150:
- Group sources before you group notebooks. Real clarity starts at the source level. Use source folders inside each notebook to separate primary research, reference material, and supporting context.
- File every new notebook the moment it's created. Assign a project collection (and a private tag if you want a workflow state) immediately — not weeks later when memory is fuzzy.
- Use consistent naming conventions. A short prefix —
[AI],[Econ],[Policy]— in the notebook title makes scanning faster even before filters are applied. - Separate active from archived work. Keep an archive tag (private) or an "Archived" collection (synced) and filter it out of your default view, so the dashboard shows only what matters this week.
- Revisit source management weekly. Five minutes removing duplicates, retitling unclear sources, and checking for stale Google Drive files keeps everything trustworthy. See How to Auto-Update & Refresh NotebookLM Sources in Bulk for automating the stale-source part.
- Let structure emerge — don't force it. Start with 3–5 collections and a few tags, add new ones only when a real pattern repeats, and retire the ones nobody uses.
These practices compound. For the features that support them, see the collections feature section, the source folders feature, and the rest of the NotebookLM Tools feature overview.
Frequently Asked Questions
Does converting tags to collections delete my tags?
No. The converter is a one-way copy — your tags are kept exactly as they were, and the result screen confirms it: "Your tags are unchanged." You can keep using tags, collections, or both side by side.
Do NotebookLM collections have colors?
No. A collection carries a name and an optional emoji, but no color. The converter bridges the gap by suggesting an emoji based on each tag's color — red becomes 🔴, green becomes 🟢, and so on — and every suggestion is editable before you run.
Can I convert collections back into tags?
No — the conversion only goes one way, from tags to collections. But because your tags are never deleted, there is nothing to undo: the originals are still there if you want to keep using them.
What happens if a collection with the same name already exists?
That tag is skipped and the existing collection is left untouched — nothing is merged, renamed, or duplicated. Name matching ignores case and surrounding spaces, and skipping duplicates makes it safe to re-run the converter any time.
Should I use tags or collections for my notebooks?
Use collections for structure you want to keep: native NotebookLM data, synced to your Google account, visible on notebook.google.com from any device. Use tags for a private, color-coded layer that lives only in your browser. A notebook can carry both at once.
Is the tags-to-collections converter free?
Yes. Tags, collections management, and the converter are all part of the free tier of NotebookLM Tools — the only requirement is connecting your NotebookLM account, because collections are written to it.
How This Fits Into the Bigger Picture
Organization is the foundation of NotebookLM Tools: once your notebooks are grouped — collections for structure, tags for state — everything else layers on cleanly, from source management to bulk importing to multi-language workflows.
If you'd like to try the dashboard, the tags, and the converter yourself, you can install NotebookLM Tools here (free, takes 30 seconds):
Install NotebookLM Tools from the Chrome Web Store
Related: How to Group & Organize Notebooks in NotebookLM (Collections) — The full collections guide: creating, bulk-assigning, filtering, and structure ideas.
Next in series: NotebookLM Tips #2: Staying Focused in Multilingual Research — Learn how to work across multiple languages without breaking your flow.
Trusted by 90,000+ NotebookLM users
Related articles
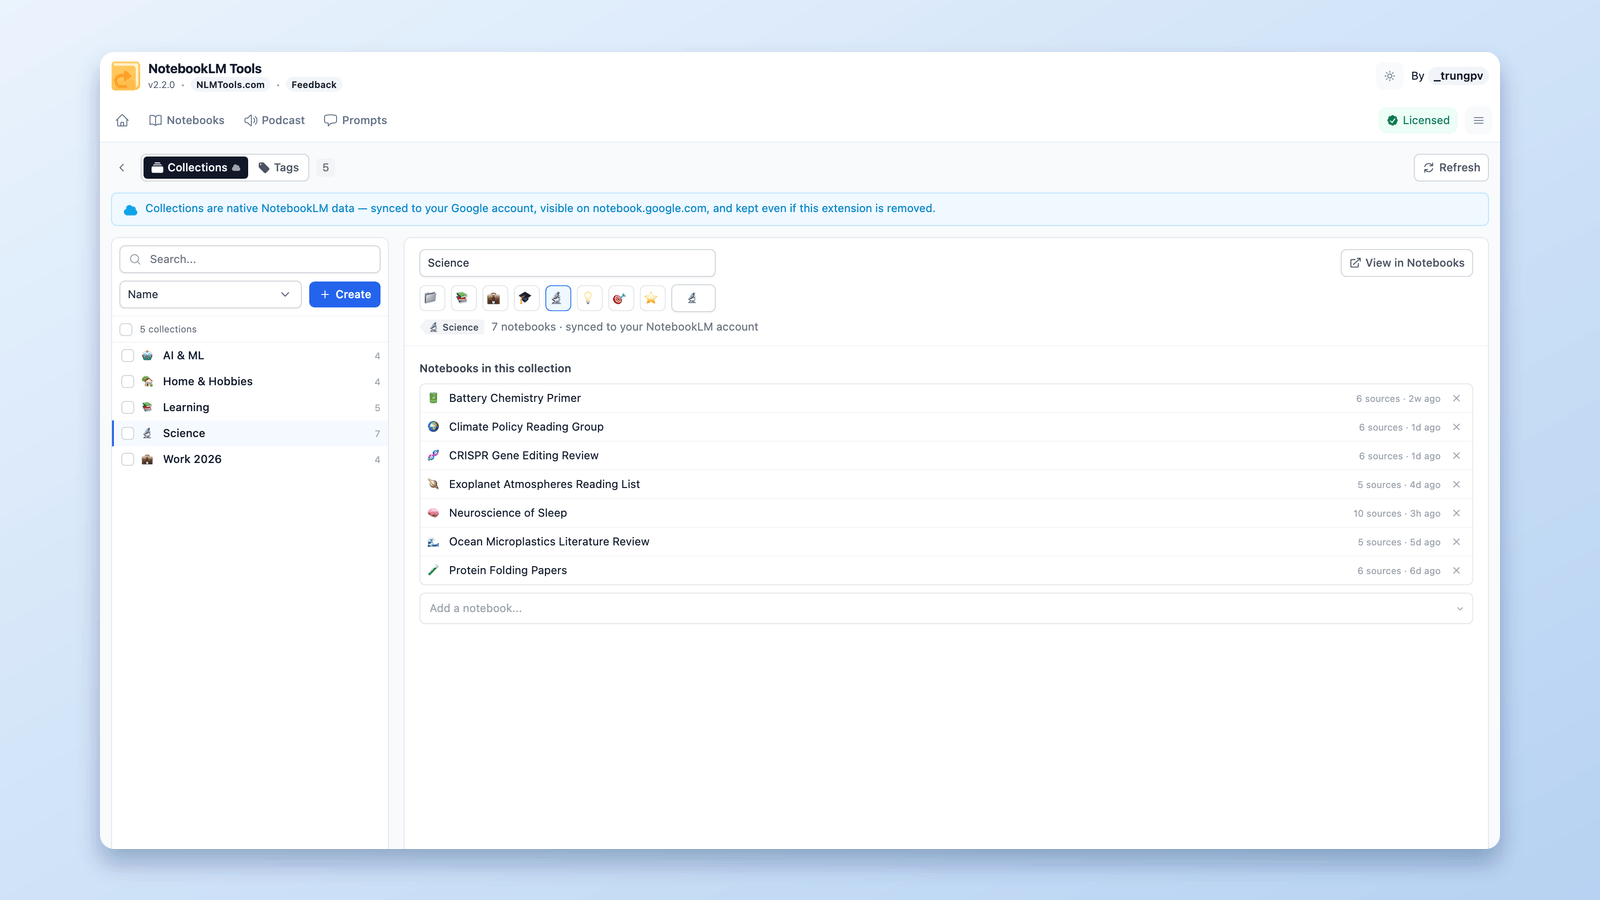
How to Group & Organize Notebooks in NotebookLM (Collections)
Yes, you can group notebooks in NotebookLM. Collections are native notebook folders synced to your Google account — create, bulk-assign, and filter in seconds.
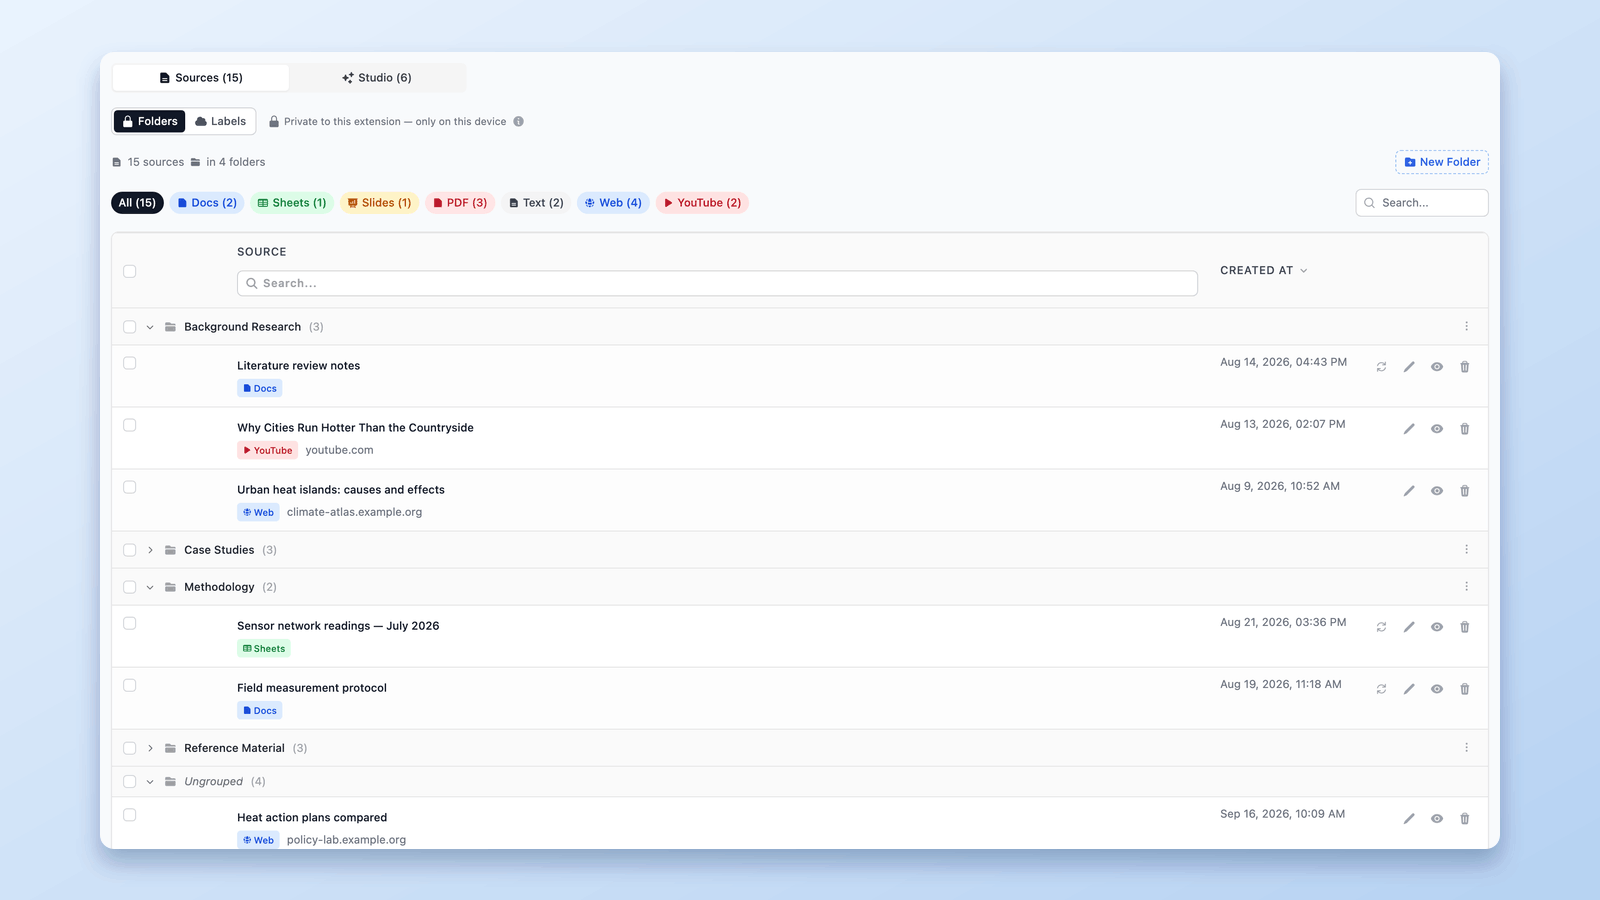
Can You Create Folders in NotebookLM? Yes — Here's How (2026)
NotebookLM has no built-in folders, but you can add them in seconds. Create up to 50 drag-and-drop source folders per notebook with a free Chrome extension.
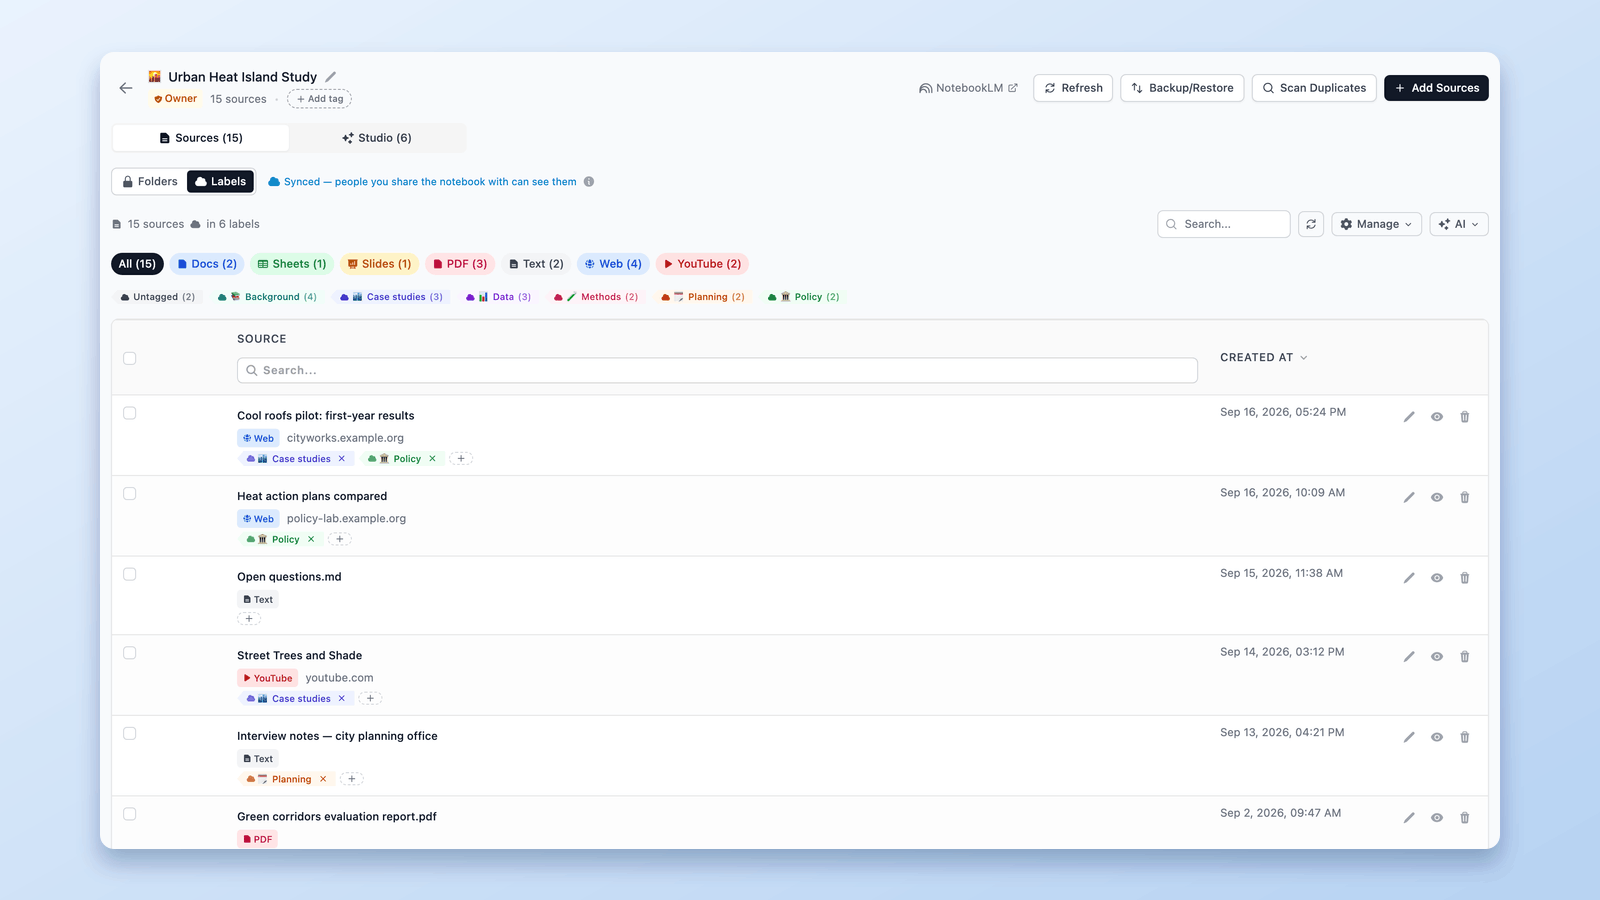
How NotebookLM Source Labels Work (+ Manage Them in a Table)
NotebookLM auto-labels your sources at 5+. See how source labels work — and manage them in a table: make your own, bulk-tag, filter, and search.