Can You Create Folders in NotebookLM? Yes — Here's How (2026)
Enhance your NotebookLM experience with our free browser extension.
View plans
If you've ever worked on a large research project in NotebookLM, you know the pain: dozens of sources stacked in a single flat list with no way to group, categorize, or visually separate them. Finding the right document means scrolling and scanning every time.
NotebookLM source folders solve this problem by letting you organize sources into named groups — directly inside NotebookLM, with simple drag-and-drop interaction.
In this guide, I'll show you how source folders work, how to create and manage them, and share workflow tips that make a real difference for researchers handling complex projects.
The Problem with Flat Source Lists
NotebookLM's default source panel is a flat list. Every source you add — whether it's a PDF, a web page, a YouTube video, or a Google Doc — appears in the same undifferentiated stream.
This is fine when you have five or ten sources. But research projects grow quickly. A literature review might involve 30+ papers. A market analysis could include competitor websites, industry reports, news articles, and internal documents. A course notebook might contain lecture notes, textbook chapters, and supplementary readings.
Without organization, you face these problems:
- Slow navigation — scrolling through dozens of sources to find what you need
- Lost context — forgetting which sources relate to which subtopic
- Cognitive overhead — your brain has to mentally categorize sources every time you look at the list
- Messy collaboration — if you share a notebook, others have no way to understand your source structure
Source folders address all of these by adding a layer of visual and structural organization that NotebookLM itself doesn't provide.
How Source Folders Work
Source folders are provided by the NotebookLM Tools extension. Once installed, you'll see folder management options in the source panel.
Creating Folders
To create a new folder, click the folder icon in the source panel toolbar. Give it a descriptive name — something that reflects the category of sources it will contain.
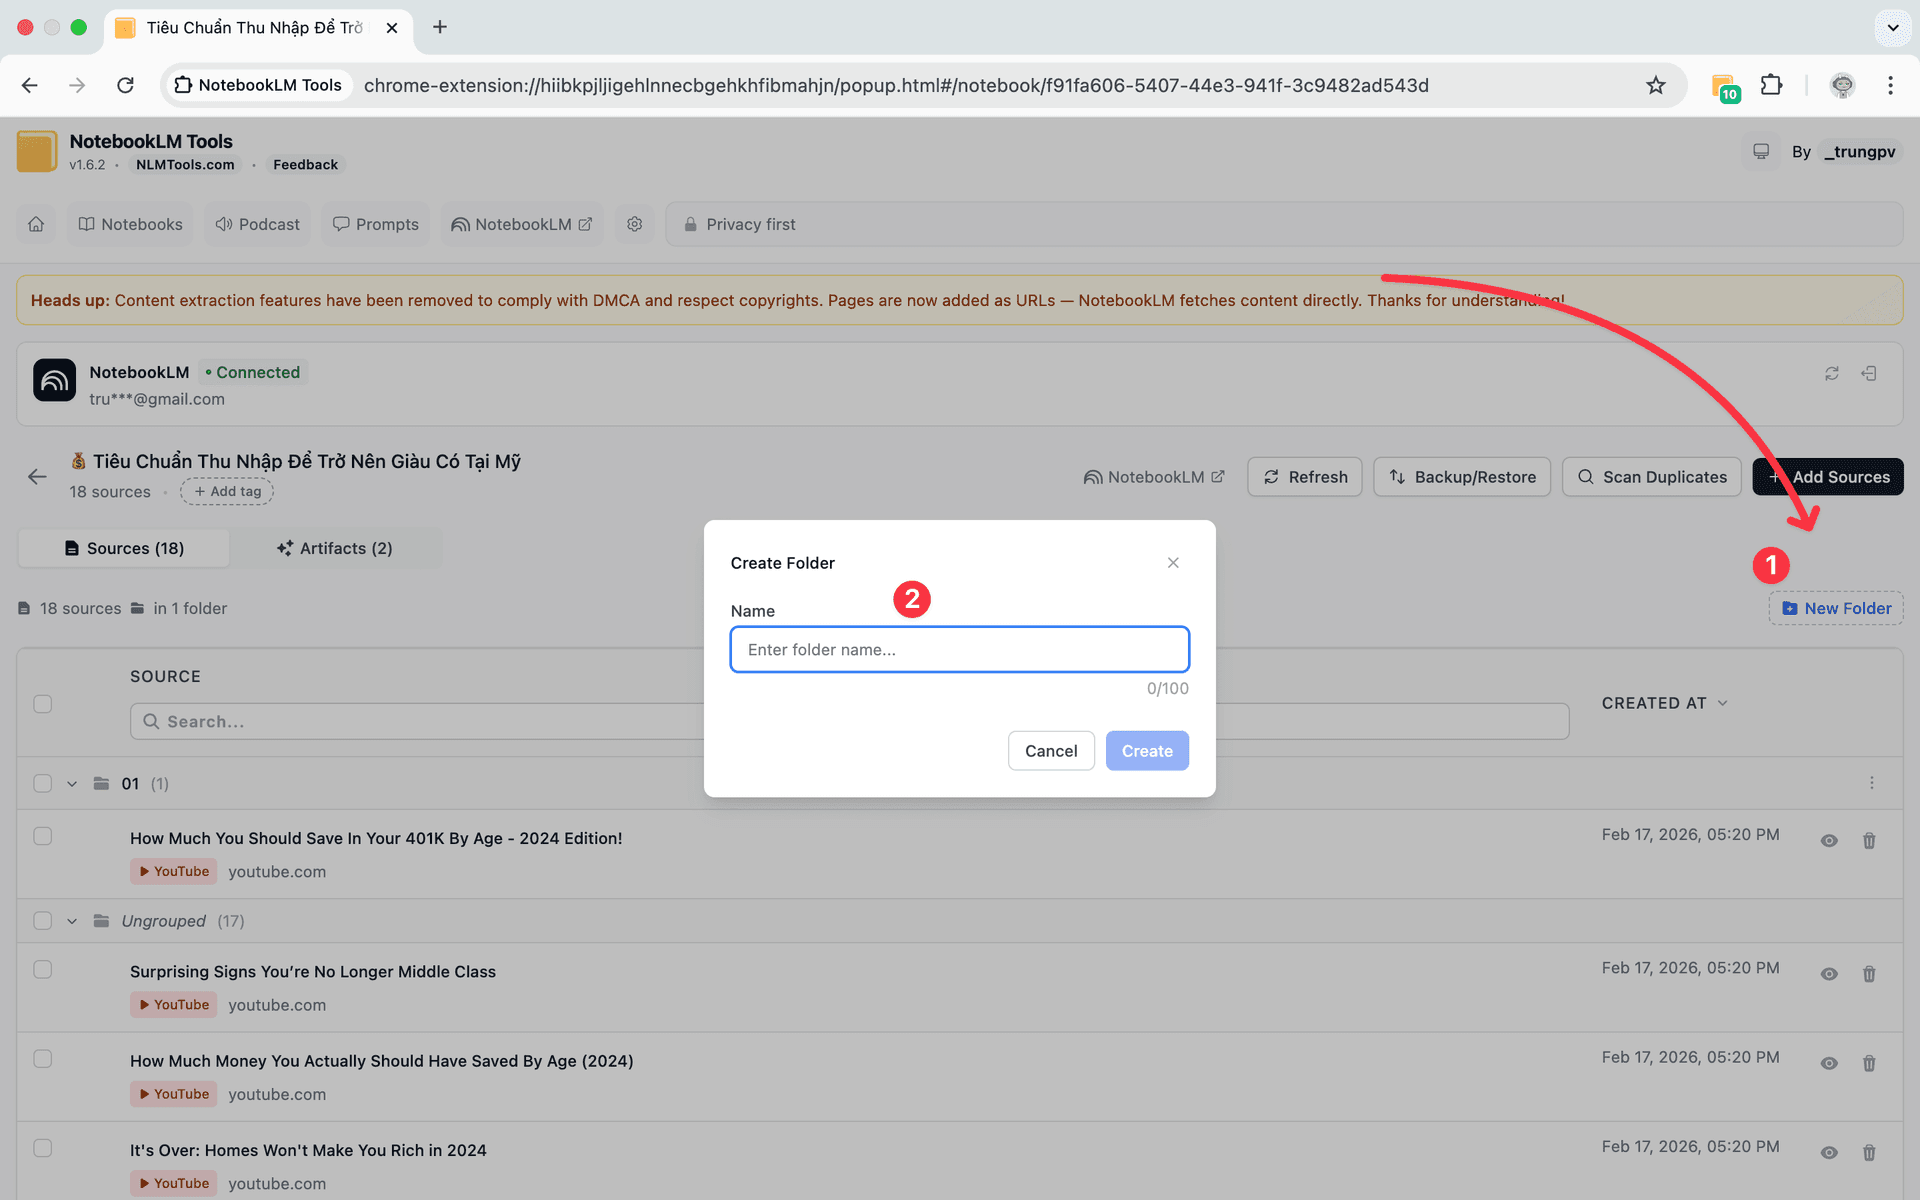
You can create up to 50 folders per notebook, which is more than enough for even the most complex research projects. Each folder can hold any number of sources.
Drag and Drop Organization
Once your folders exist, organizing is as simple as dragging a source and dropping it into a folder. The interaction feels natural — exactly like moving files into folders on your desktop.
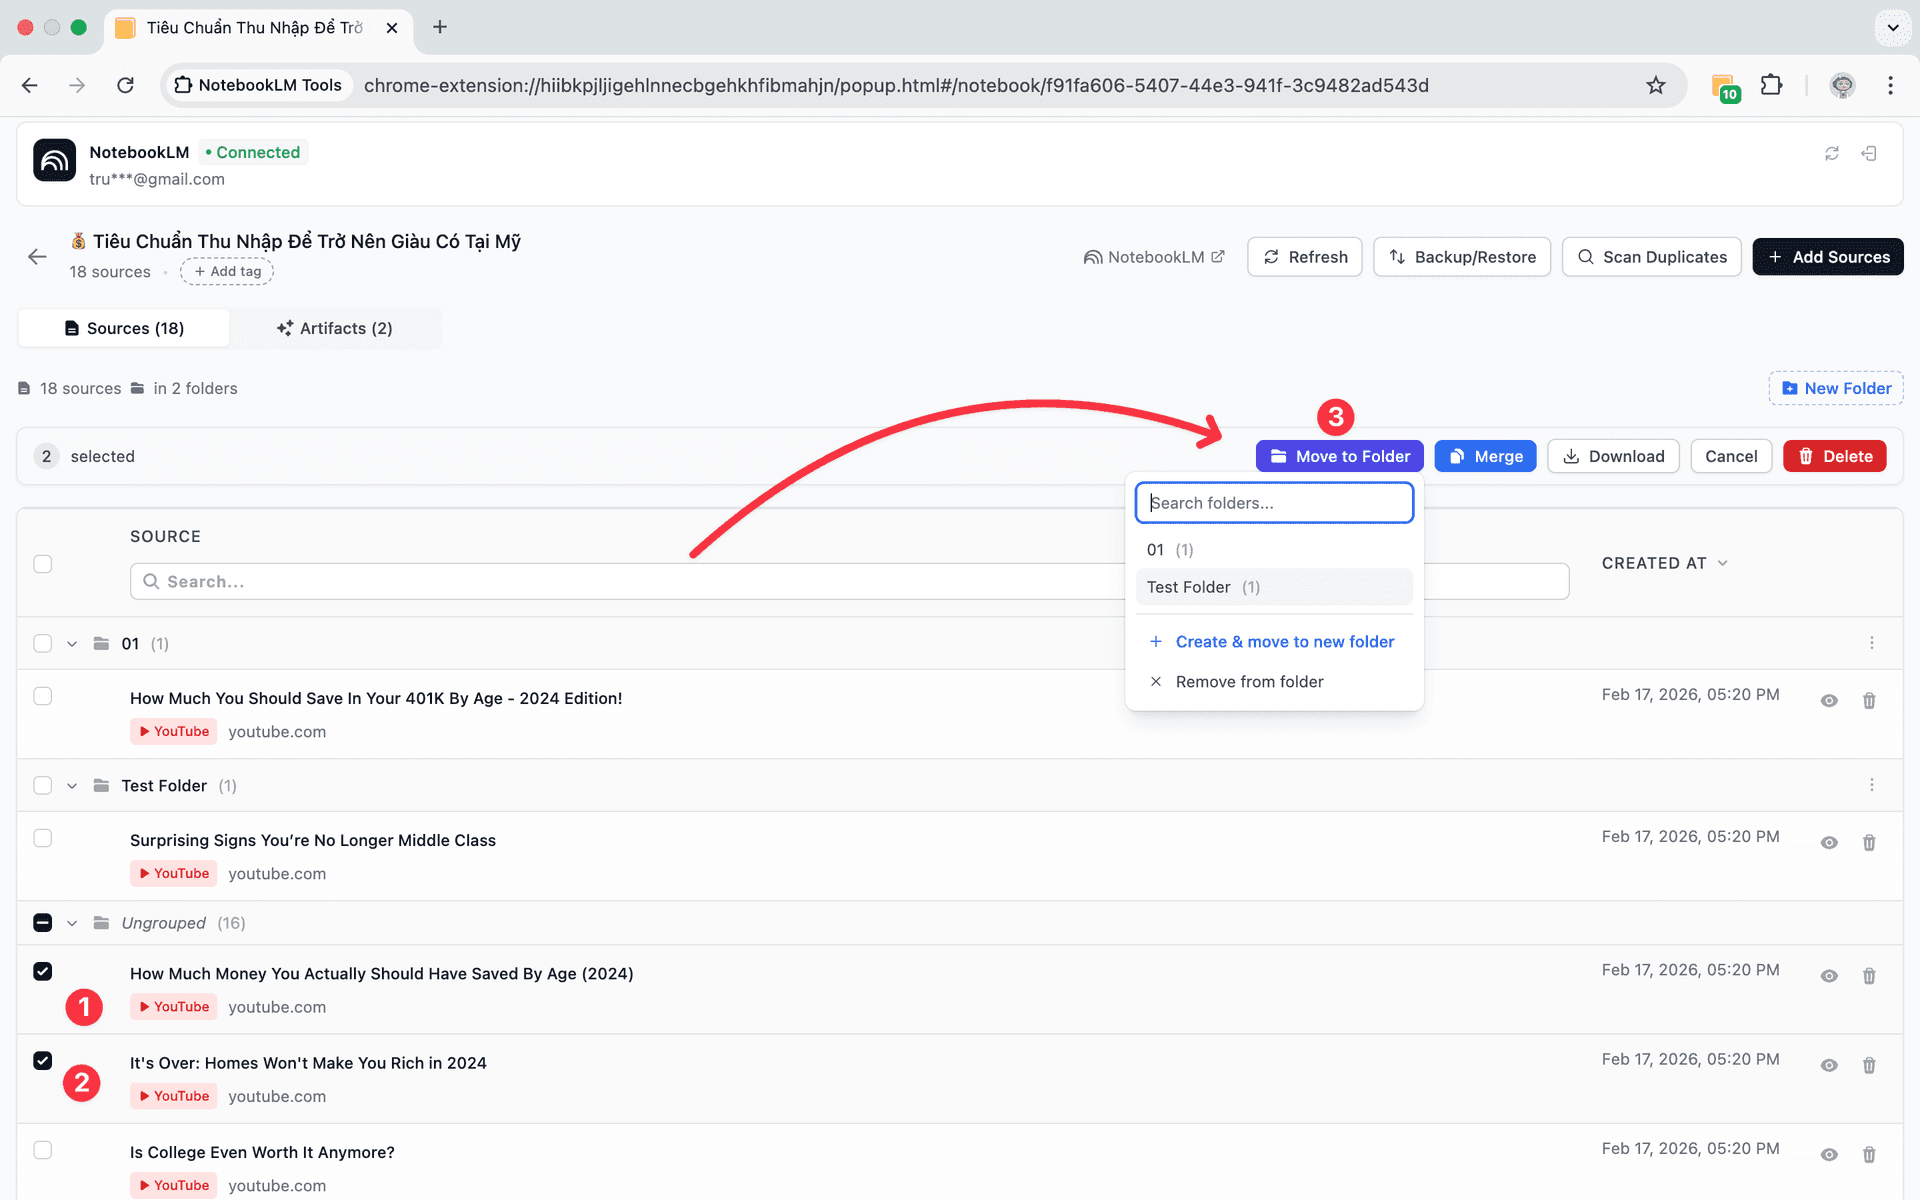
You can also:
- Move sources between folders by dragging them
- Remove a source from a folder back to the root level
- Collapse and expand folders to reduce visual clutter
- Rename folders as your project evolves
Folder Structure Examples
Here are a few ways researchers typically organize their folders:
By topic or theme:
- Background Research
- Methodology
- Case Studies
- Competing Approaches
By source type:
- Academic Papers
- Web Articles
- YouTube Videos
- Internal Documents
By project phase:
- Phase 1 — Discovery
- Phase 2 — Analysis
- Phase 3 — Synthesis
By priority:
- Primary Sources
- Supporting Evidence
- Reference Material
The right structure depends on your project. The key is that folders let you impose whatever organization makes sense for how you think about the material.
Step-by-Step: Setting Up Source Folders
Step 1: Install NotebookLM Tools
If you haven't already, install NotebookLM Tools from the Chrome Web Store. It works on Chrome, Edge, Brave, Arc, Opera, and Firefox.
Step 2: Open Your Notebook
Navigate to NotebookLM and open the notebook you want to organize. Your existing sources will appear in the source panel as usual.
Step 3: Create Your Folder Structure
Before dragging sources, think about the categories that make sense for your project. Create 3-5 folders to start — you can always add more later.

Step 4: Sort Sources into Folders
Drag each source into the appropriate folder. If a source could belong to multiple categories, pick the most relevant one — you can always move it later.
Step 5: Collapse for Clarity
Once organized, collapse the folders you're not actively working with. This dramatically reduces visual noise and lets you focus on the sources that matter right now.
Workflow Tips for Researchers
Create folders before you start importing. If you know the general structure of your research project, set up folders first. Then as you import sources, drop them directly into the right folder. This prevents the "pile of unsorted sources" problem from ever forming.
Use a naming convention. Prefix folder names with numbers (01, 02, 03) to control their display order, or use emoji-free descriptive names that make sense at a glance.
Combine folders with right-click import. When you right-click to add web pages during a browsing session, follow up by organizing the new sources into folders before they pile up.
Reorganize as your understanding evolves. Research projects shift as you learn more. Don't be afraid to rename folders, merge categories, or create new ones. The drag-and-drop system makes reorganization fast.
Use folders to scope your AI conversations. When you select sources in NotebookLM to include in a chat, folders help you quickly identify and select the right subset. Instead of scanning a long list, expand the relevant folder and select the sources within it.
Frequently Asked Questions
Can you create folders in NotebookLM?
Not with NotebookLM alone — the native source panel is a flat list with no grouping. The free NotebookLM Tools extension adds drag-and-drop source folders directly inside NotebookLM, with up to 50 folders per notebook.
How many folders can I create?
You can create up to 50 folders per notebook. Each folder can contain any number of sources.
Can I nest folders inside other folders?
Currently, folders are a single level — you cannot create subfolders. For most research projects, one level of organization is sufficient. If you need more granularity, consider using descriptive folder names that encode hierarchy (e.g., "Research > Methods" or "Ch1 - Introduction").
Do folders affect how NotebookLM's AI works?
No. Folders are purely organizational. They don't change how NotebookLM indexes, searches, or generates responses from your sources. The AI still has access to all sources regardless of which folder they're in.
Can I move sources between folders?
Yes. Simply drag a source from one folder to another. You can also drag it back to the root level if you want to unfolder it entirely.
Bring Structure to Your Research
Flat source lists work for simple projects, but serious research demands organization. Source folders give you a fast, visual way to structure your materials so you can spend less time managing and more time thinking.
Install NotebookLM Tools to start organizing your sources today. See how folders work in context on the source folders feature page, or browse the full feature list.
Related articles:
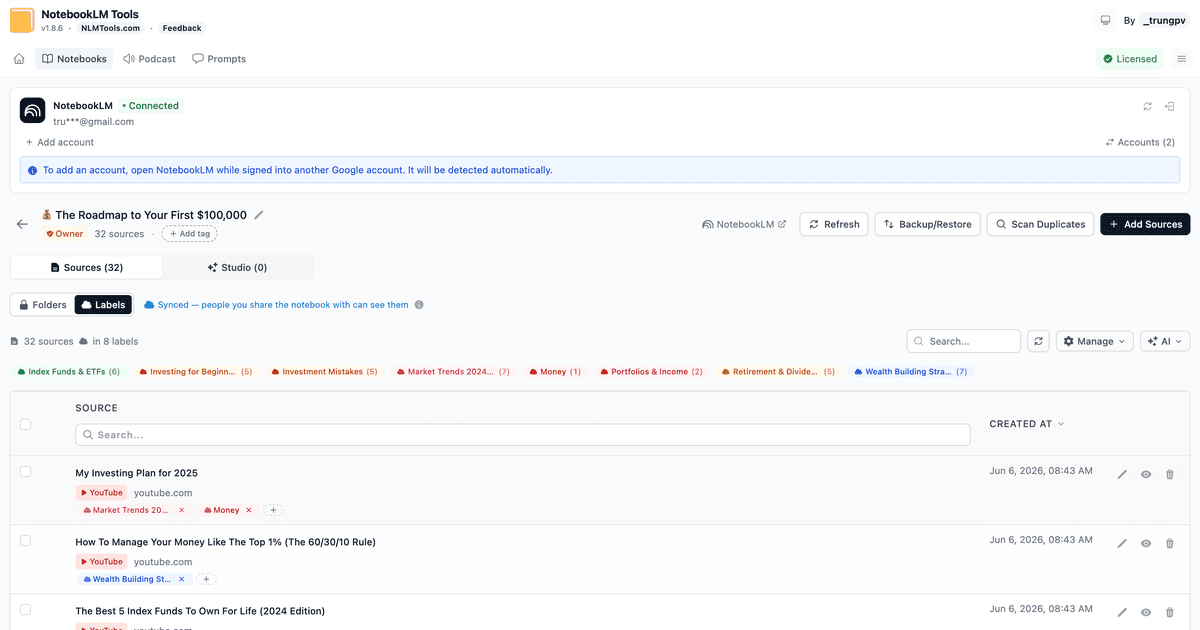
- How NotebookLM Source Labels Work — Folders organize sources into groups; labels add a second, filterable dimension on top.
- FolderLM Alternative With More Than Folders — Comparing folder-focused extensions for NotebookLM.
- How to Auto-Update & Refresh NotebookLM Sources in Bulk — Detect stale sources and sync them with one click.
- How to Organize NotebookLM Notebooks with Tags, Search & Dashboard — Foundational tips for notebook-level organization.
- NotebookLM Tips #3: All the Ways to Import Sources — Every method for getting sources into NotebookLM.
Trusted by 90,000+ NotebookLM users
Related articles
How to Organize NotebookLM Notebooks with Tags, Search & Dashboard
Drowning in notebooks? Organize your NotebookLM workspace with tags, instant search, and a unified dashboard — a free workflow that scales past 50 notebooks.
How NotebookLM Source Labels Work (and How to Manage Them in a Table)
NotebookLM auto-labels your sources at 5+. See how source labels work — and manage them in a table: make your own, bulk-tag, filter, and search.
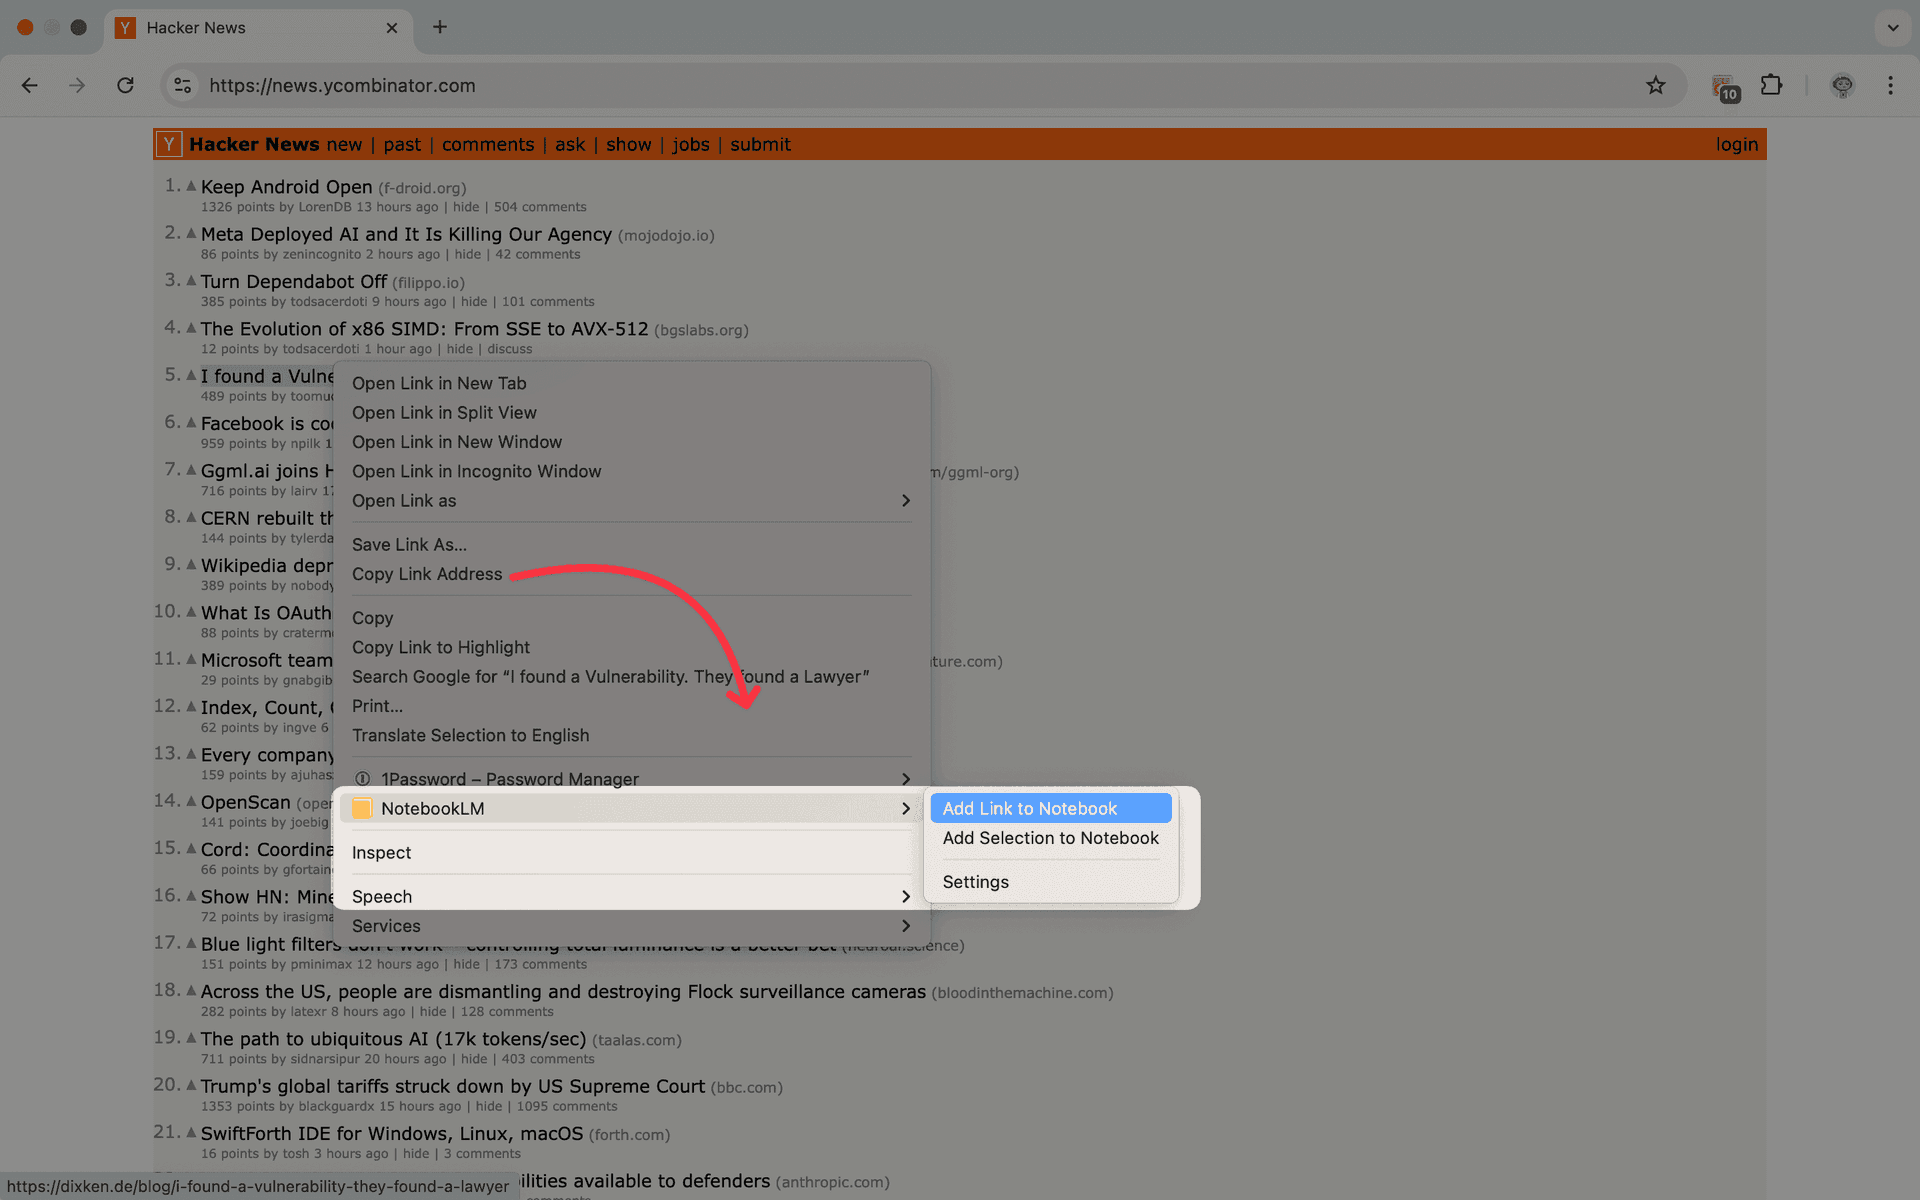
Add Web Pages to NotebookLM with a Right-Click (7 Context-Menu Tools)
Import any web page into NotebookLM straight from a right-click. Seven context-menu actions capture pages, selections, and links as you browse — no copy-paste, no tab switching.