How to Import Sources into NotebookLM (Every Method, 2026)
Enhance your NotebookLM experience with our free browser extension.
View plans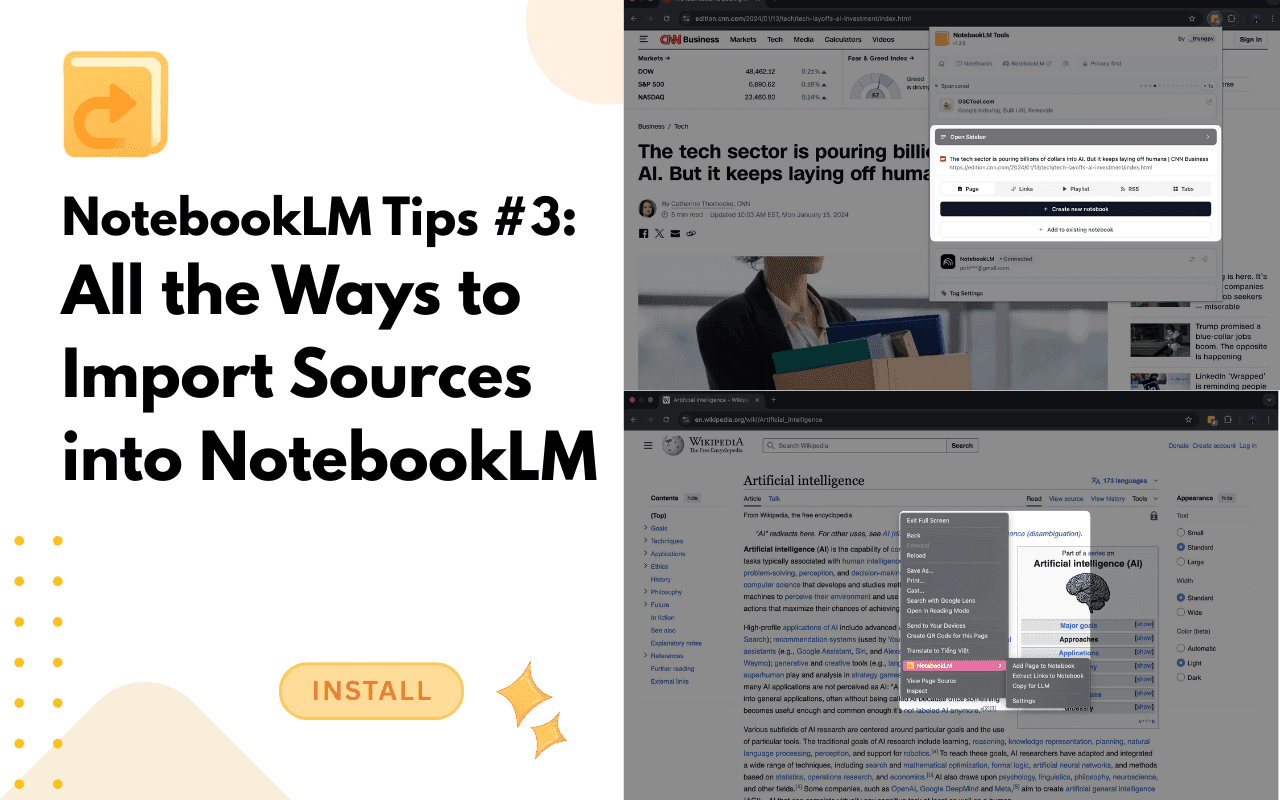
One of the biggest strengths of NotebookLM isn't just how it analyzes information — it's how quickly you can get information into it.
If importing sources feels slow or fragmented, your research momentum breaks. That's why NotebookLM Tools is designed around capture speed, flexibility, and real-world research workflows.
In this post, I'll walk through every way you can import sources into NotebookLM, using real examples from different websites — exactly the way you'd encounter them during actual research.
#01. Popup & Sidebar
Two interfaces, one import system
NotebookLM Tools gives you two main entry points for importing sources: the popup and the sidebar.
While they look different, they're powered by the same import engine underneath.
From both the popup and the sidebar, you can use the extension's six import methods:
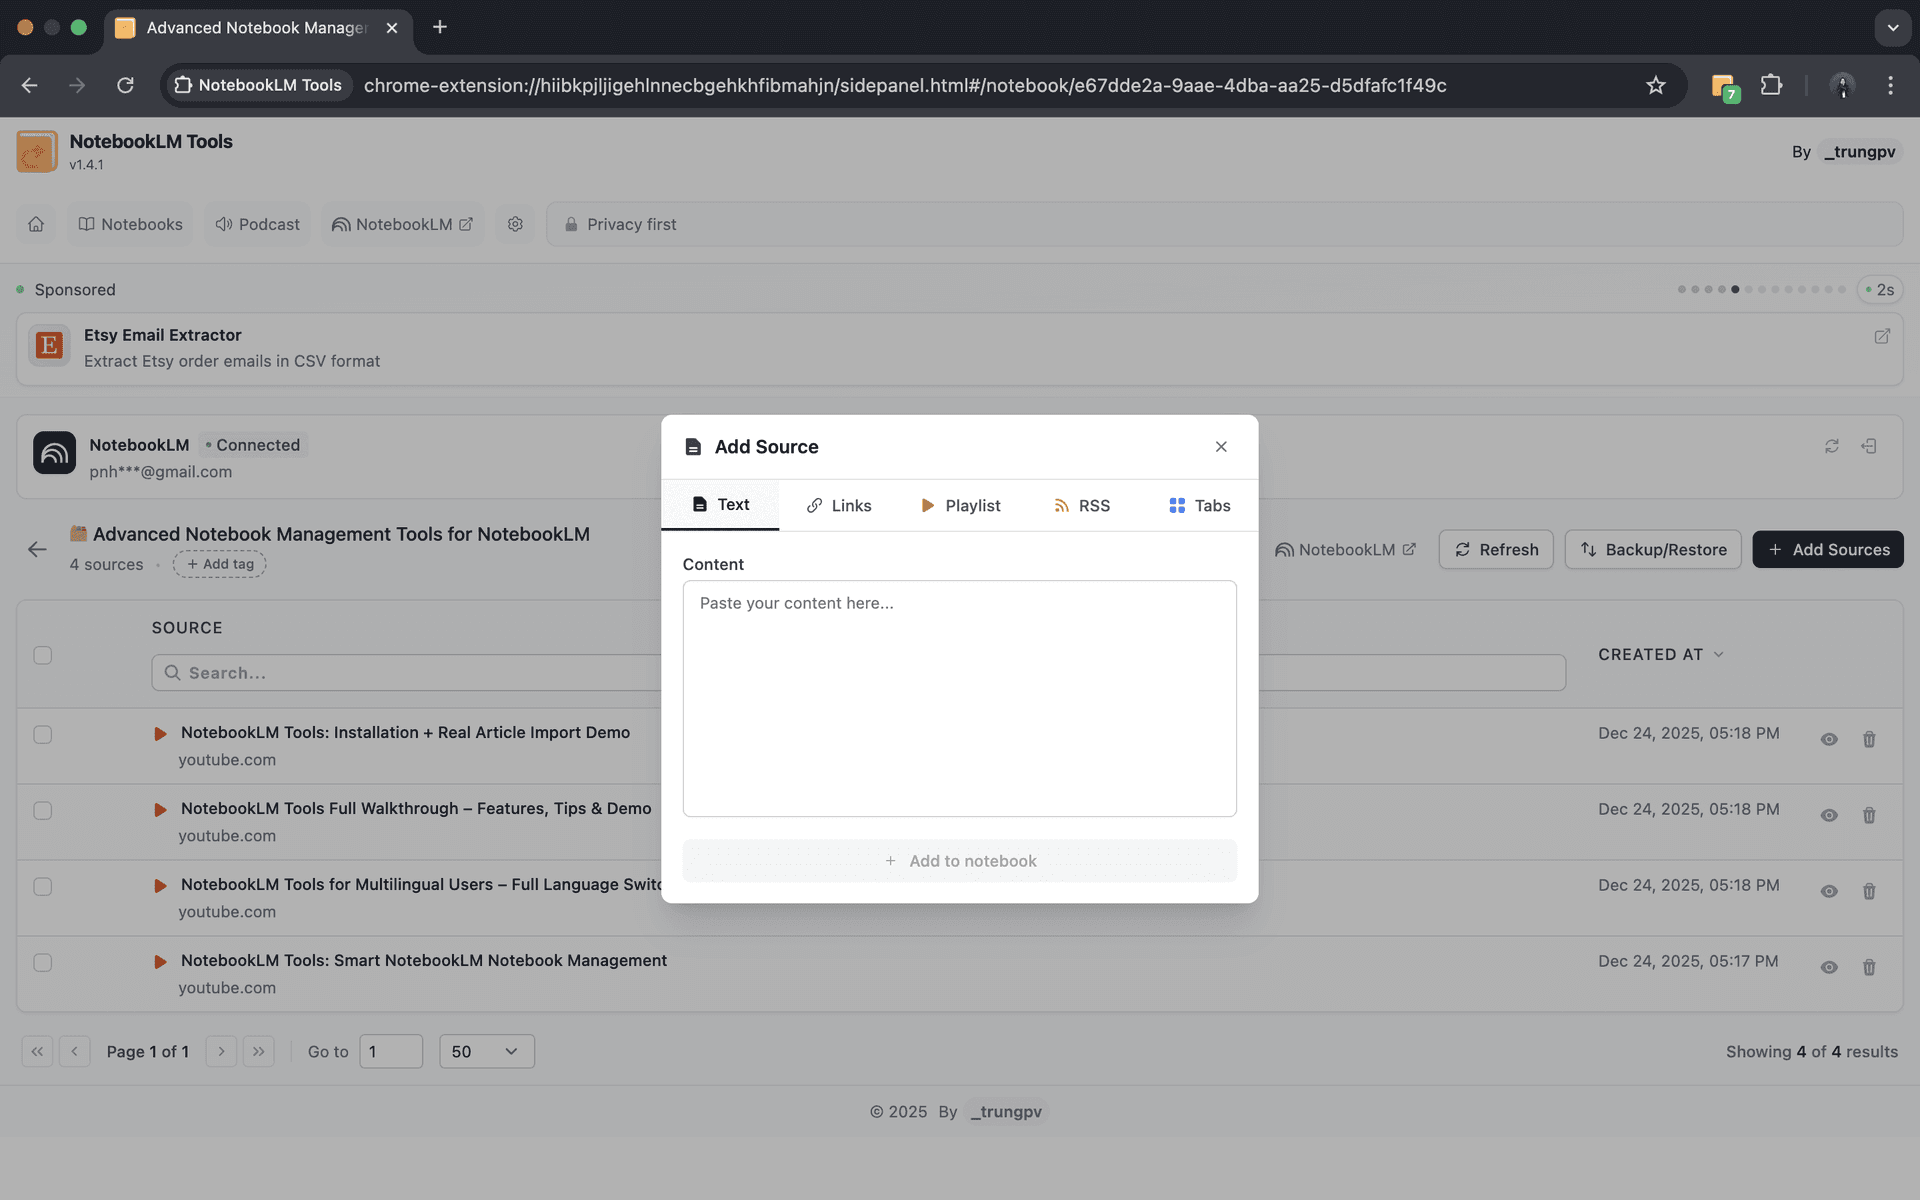
- Paste or type text directly as a source
- Add single or batch URLs (including links collected from a page)
- Import YouTube playlists
- Import RSS feeds
- Import multiple open tabs
- Upload a ZIP file of Markdown sources
No matter which interface you use, the result is the same: your sources are added to NotebookLM, and the source management screen opens automatically, allowing you to review, clean, and organize everything before moving on.
The difference comes down to how you work.
Popup: built for speed
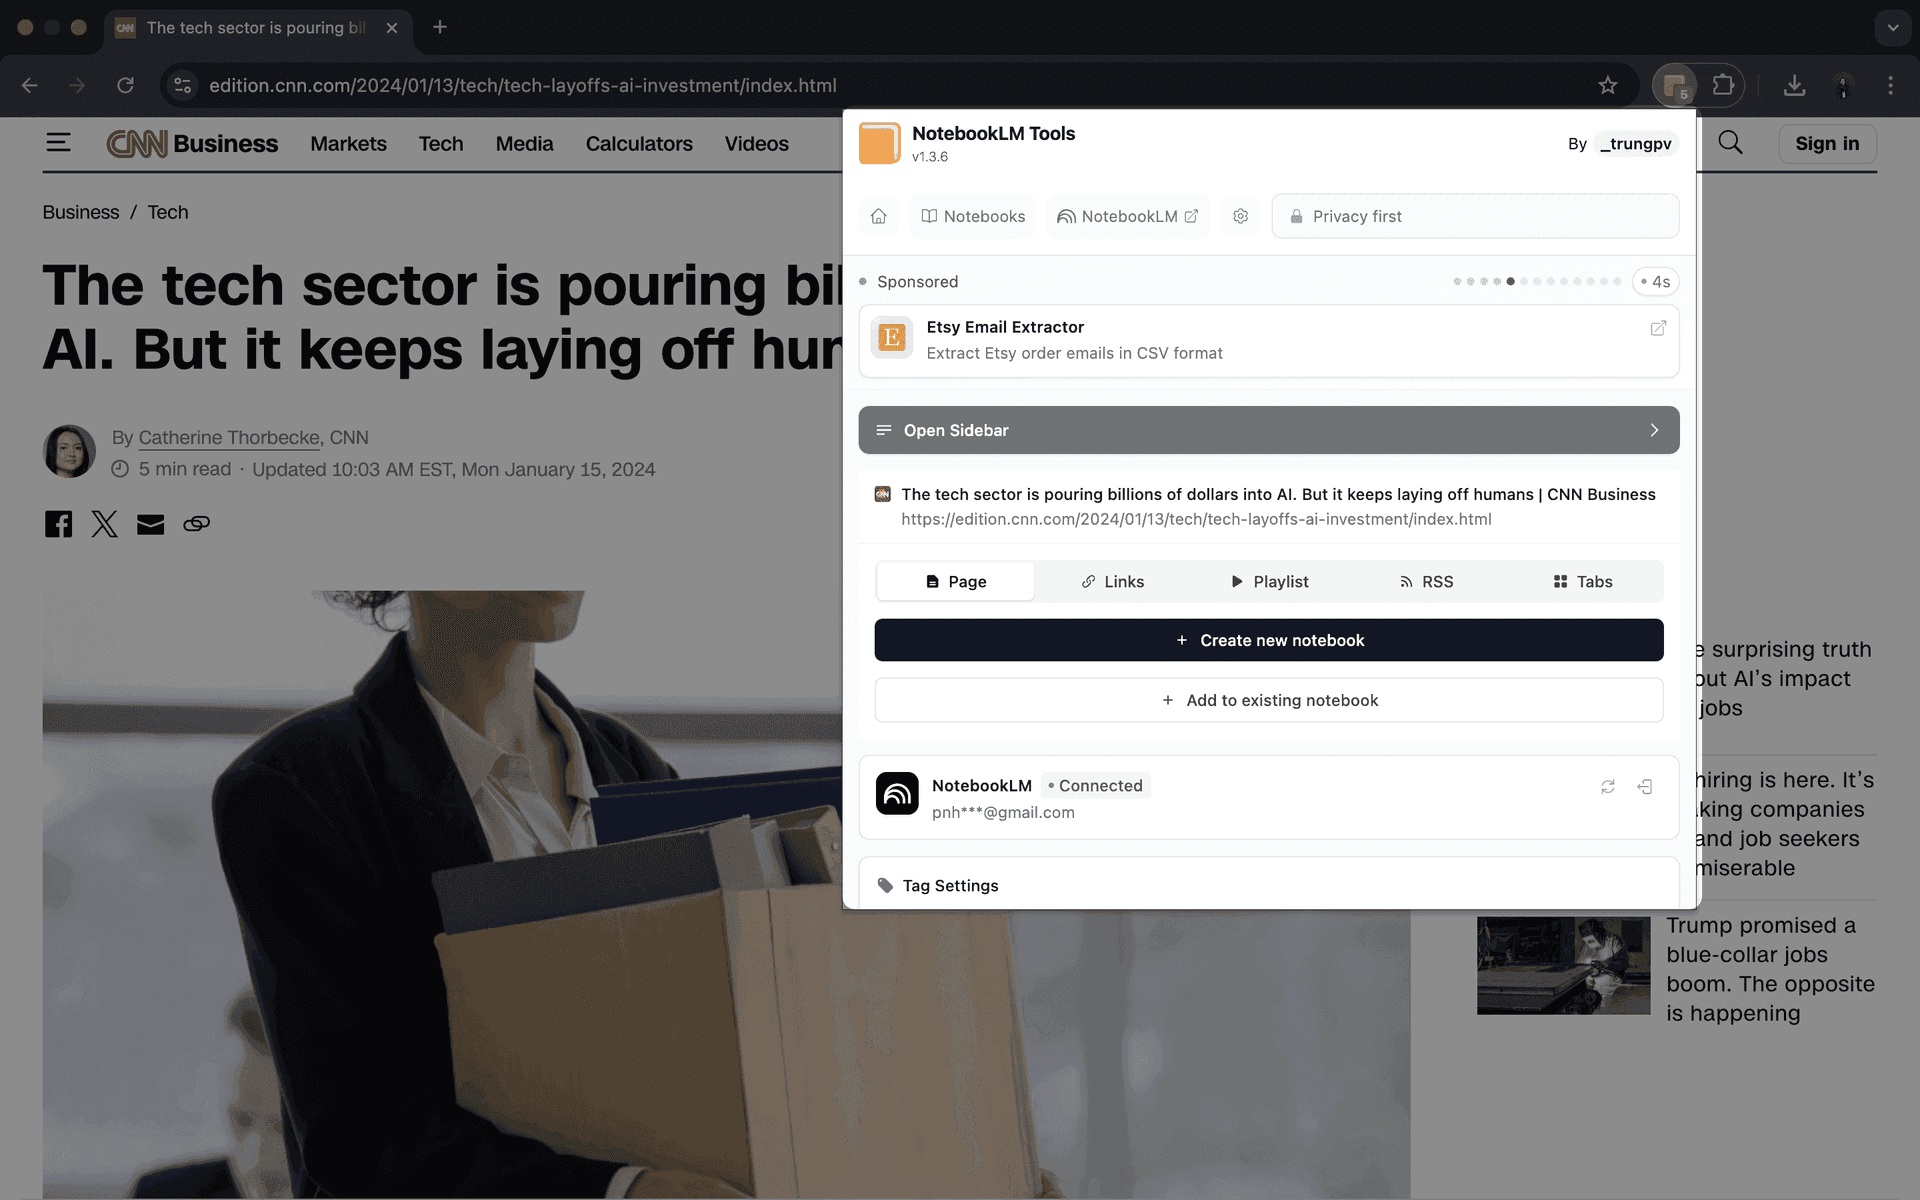
The popup is designed for quick capture.
It's ideal when you're reading an article and want to save it instantly without interrupting your flow. One click, one action, and you're right back to reading.
This makes it perfect for fast, opportunistic research moments.
Sidebar: built for continuity
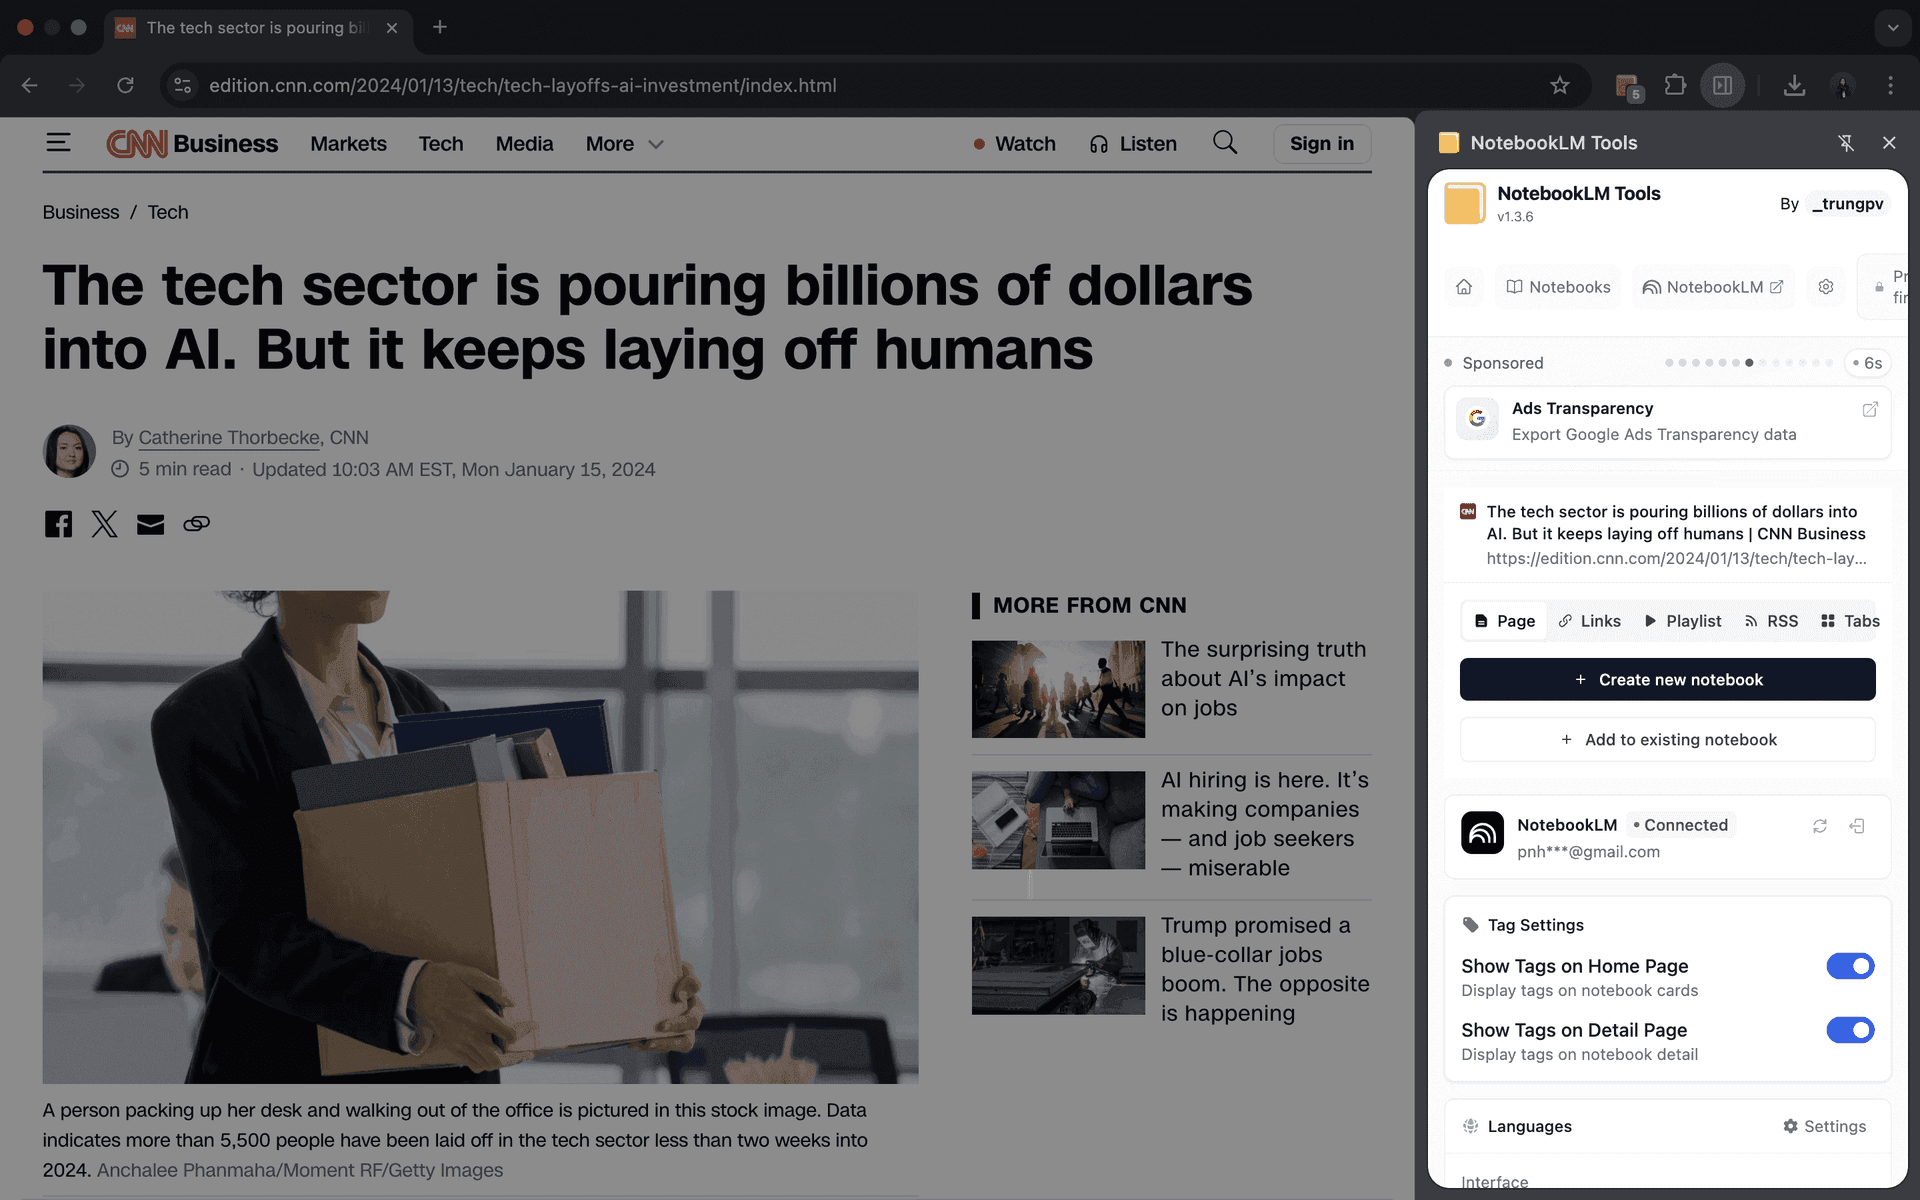
The sidebar, on the other hand, is designed for longer research sessions.
It stays open while you browse, making it easier to collect multiple sources across different pages, switch between import types, and build up a notebook step by step without losing context.
#02. Context Menu
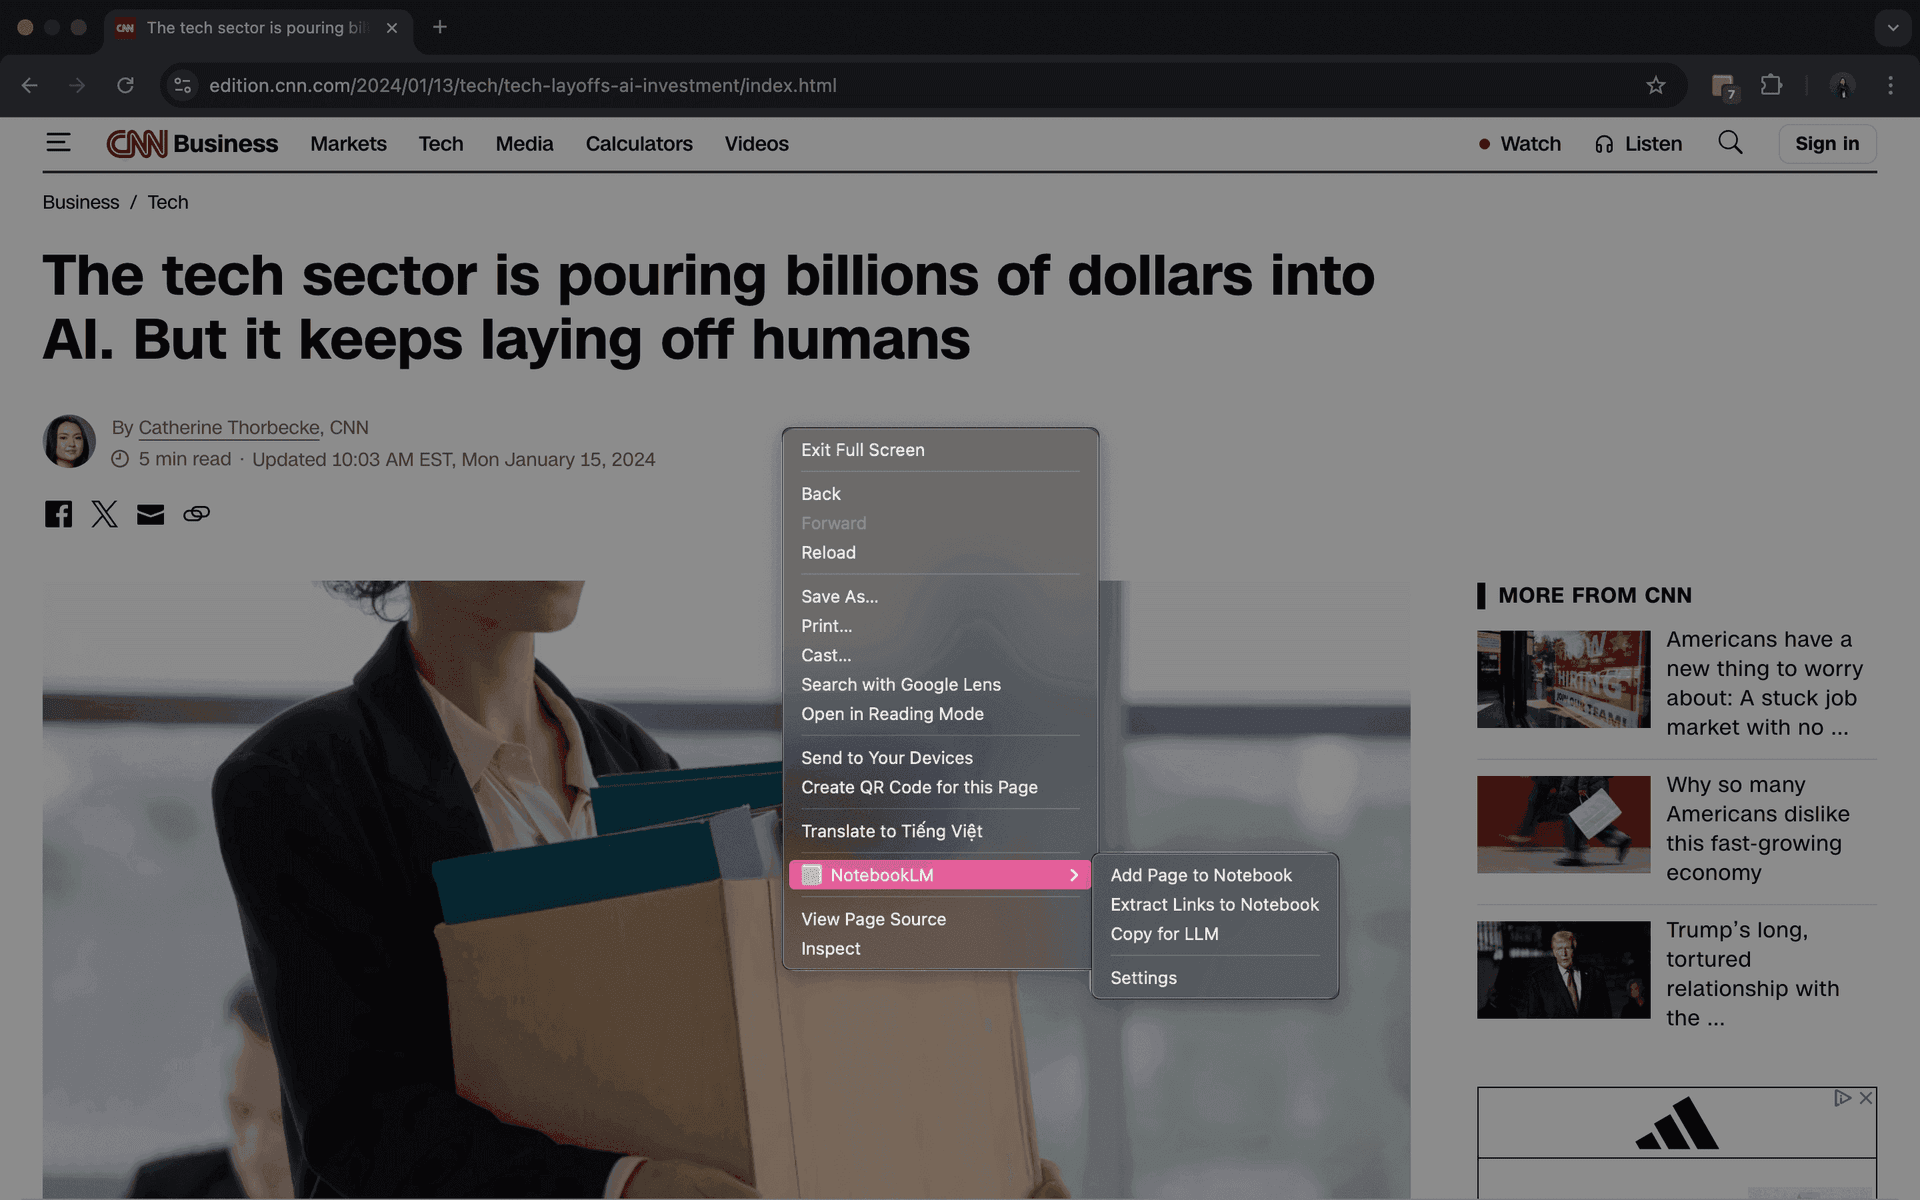
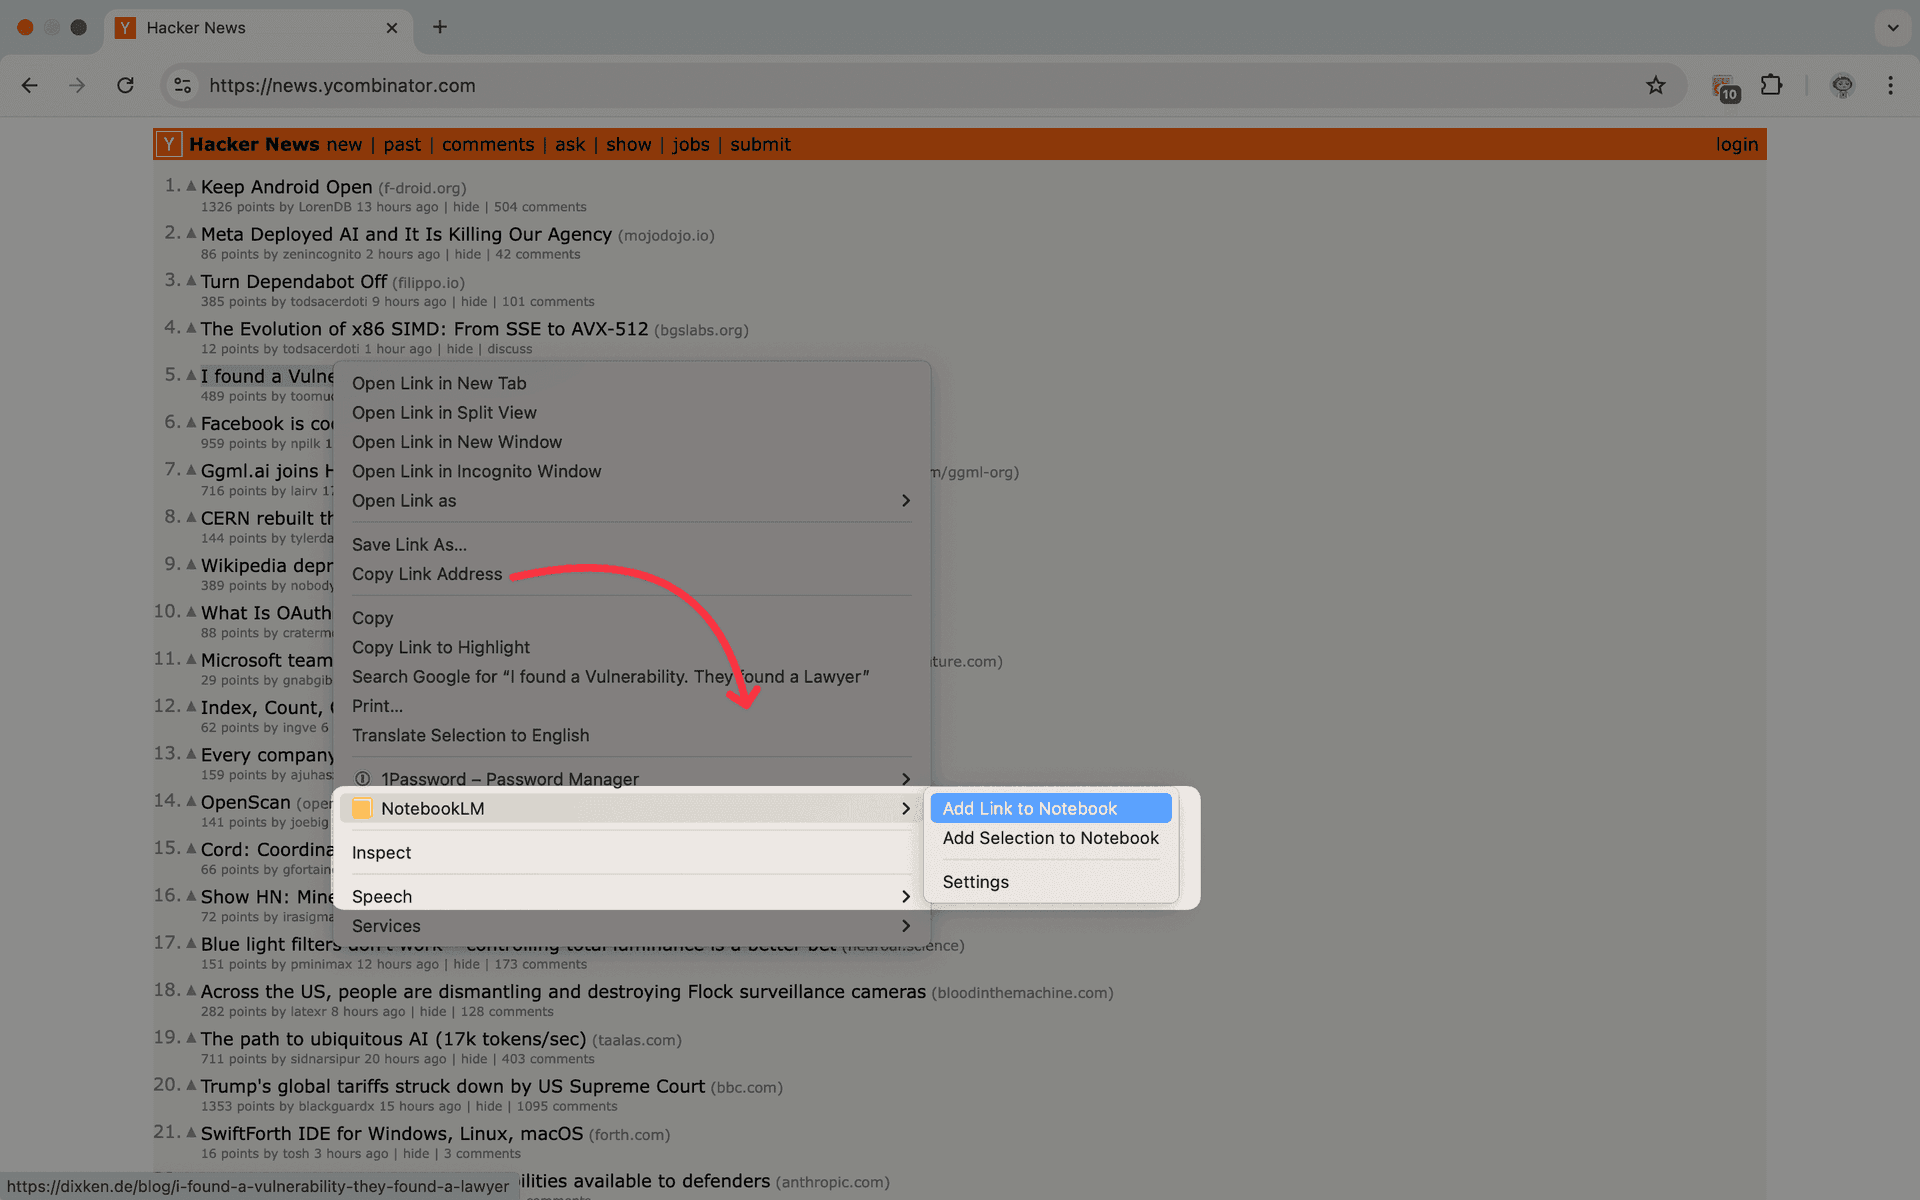
One of the simplest — yet most powerful — ways to add sources into NotebookLM is through the context menu.
Instead of opening the extension, switching to the sidebar, or changing tabs, you can just right-click directly on the page you're reading and send it into your notebook.
This keeps you in reading mode instead of tool-management mode.
When you're actively reading, comparing, or scanning multiple articles, stopping to manage tools breaks your momentum. The context menu keeps everything lightweight and invisible. You stay focused on the content, and NotebookLM stays quietly in the background.
With a single right-click, you can add the current page as a source and move on immediately. There's no setup, no extra UI, and no mental context switch.
The real benefit here is frictionless capture.
You don't have to decide "how" to save something — you just save it at the exact moment it feels useful. Over time, this changes how you research. You collect more relevant material, miss fewer important references, and keep your notebook naturally aligned with what you're actually reading.
In short, the context menu turns source importing into a reflex — not a task.
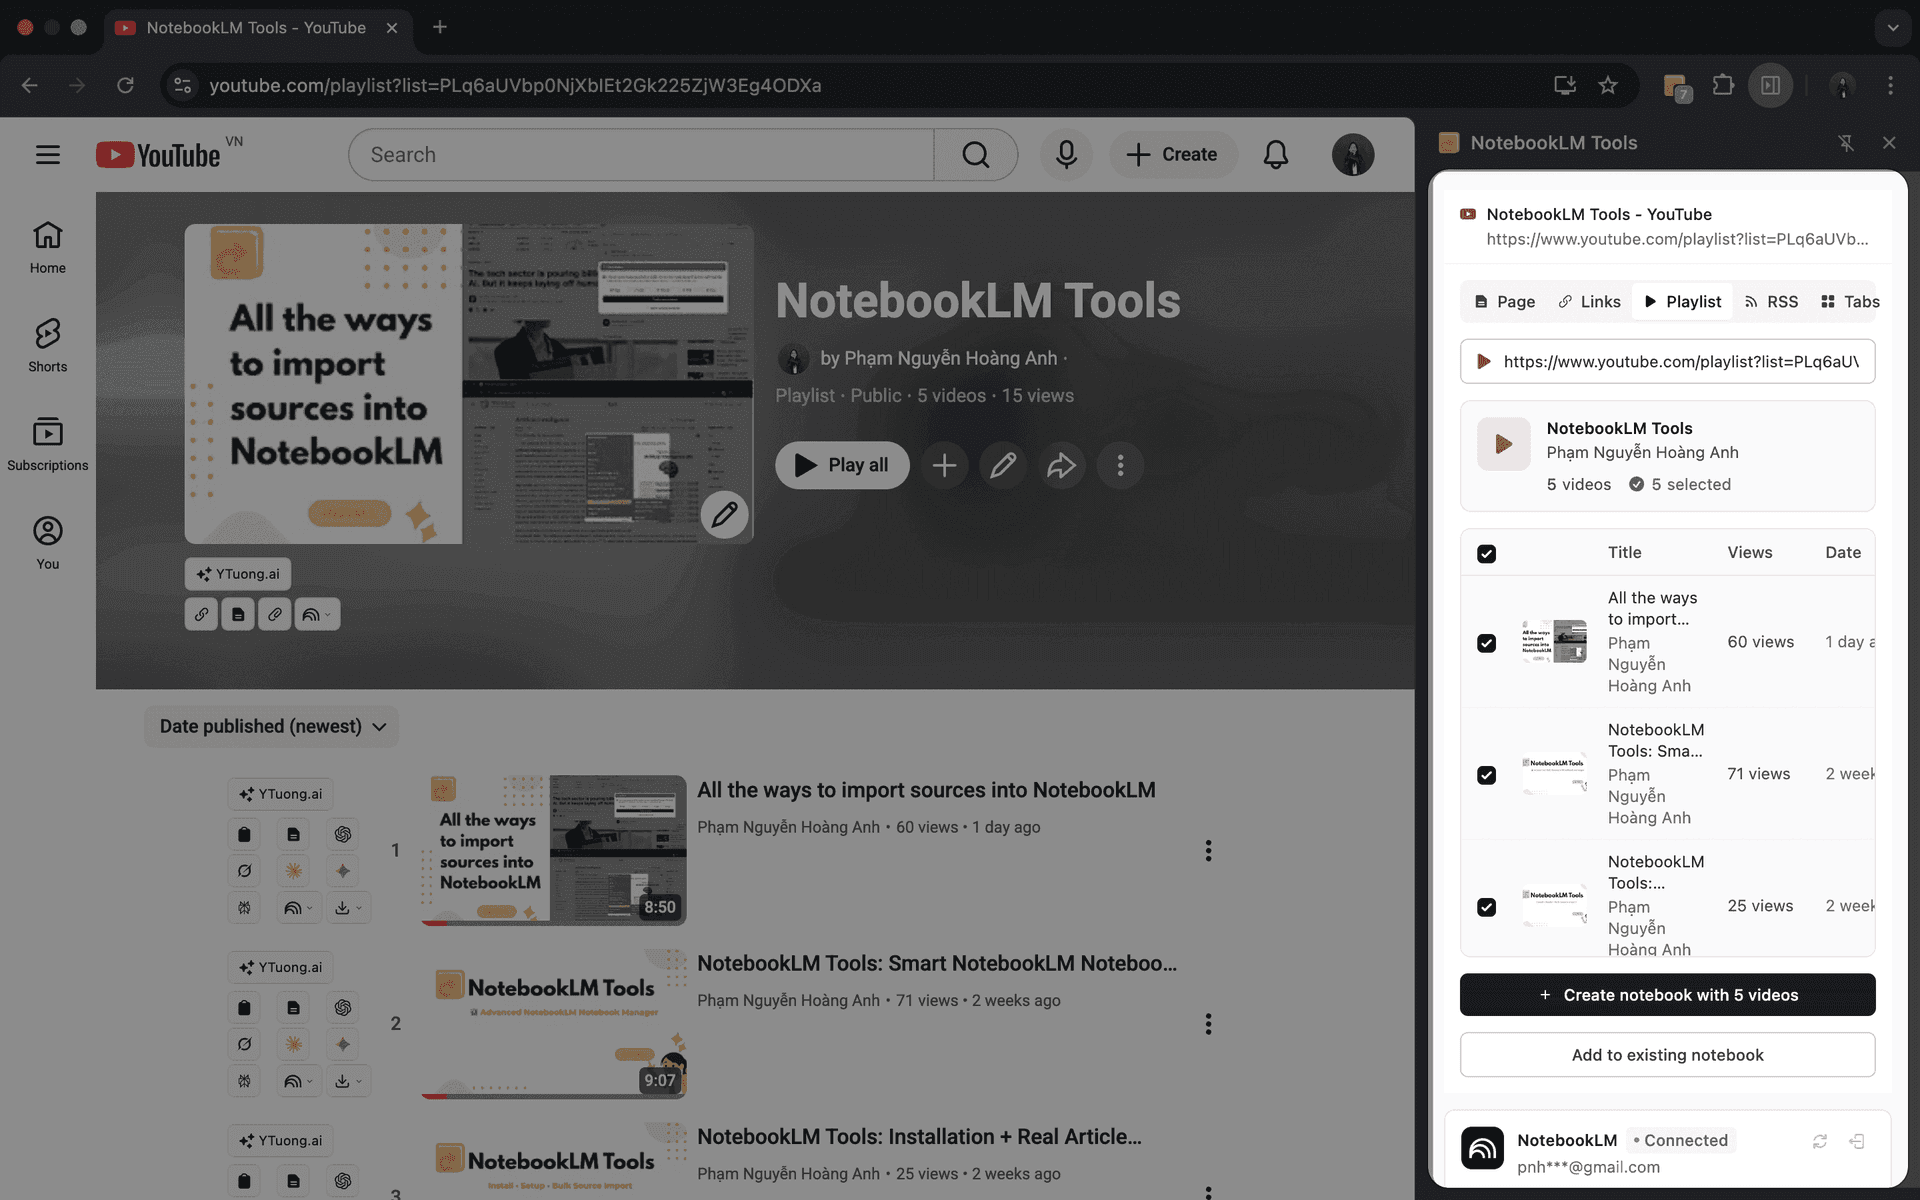
#03. Video Learning - YouTube playlist import
Research isn't limited to text — some of the most valuable insights live in video.
When you open a YouTube playlist, NotebookLM Tools instantly recognizes it and switches to playlist mode automatically. With a single action, you can:
- Parse the entire playlist
- Review video titles, upload dates, and view counts
- Import each video as an individual source
NotebookLM itself then turns each imported video into a clean, searchable transcript, allowing you to query spoken knowledge just like written content.
#04. RSS Feeds - Keeping your research up to date
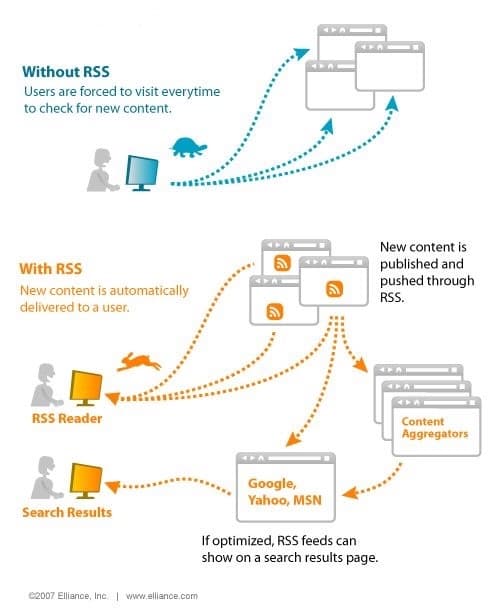
RSS feeds are a simple way for websites to publish updates in a structured stream.
Whenever new content is released, it appears in the feed automatically.
Without RSS, staying updated means manually revisiting websites and checking for new articles. With RSS, new content comes to you instead.
NotebookLM Tools makes RSS easy by removing the technical setup. When you open a site, you can click Detect RSS and the extension automatically finds available RSS feeds — no guessing, no manual searching.
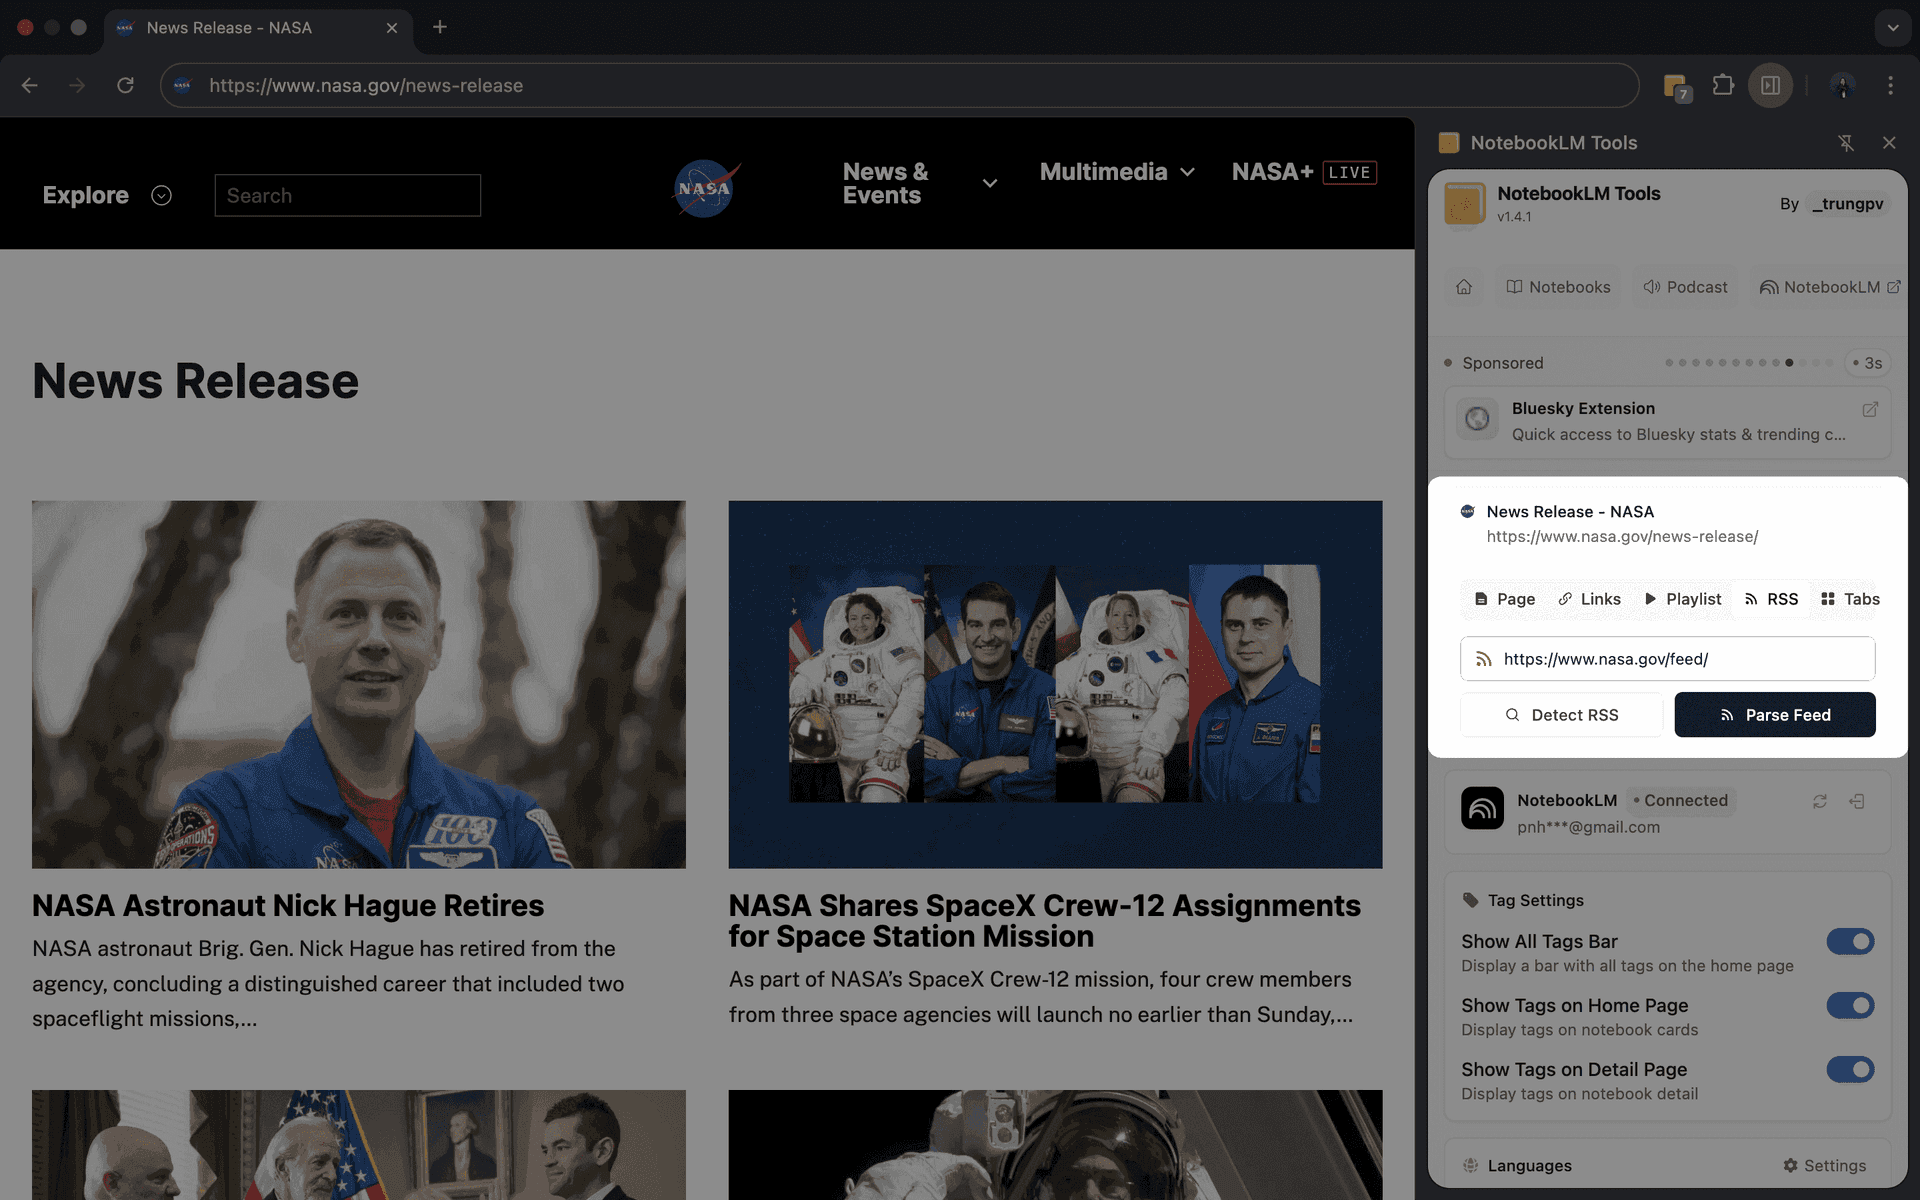
Once detected, you can parse the feed, select relevant articles, and add them to a notebook. From that point on, new updates from the same source can be tracked without repeated manual work.
RSS turns your notebook from a static collection into a continuously updated research stream.
#05. Bulk Tab Import
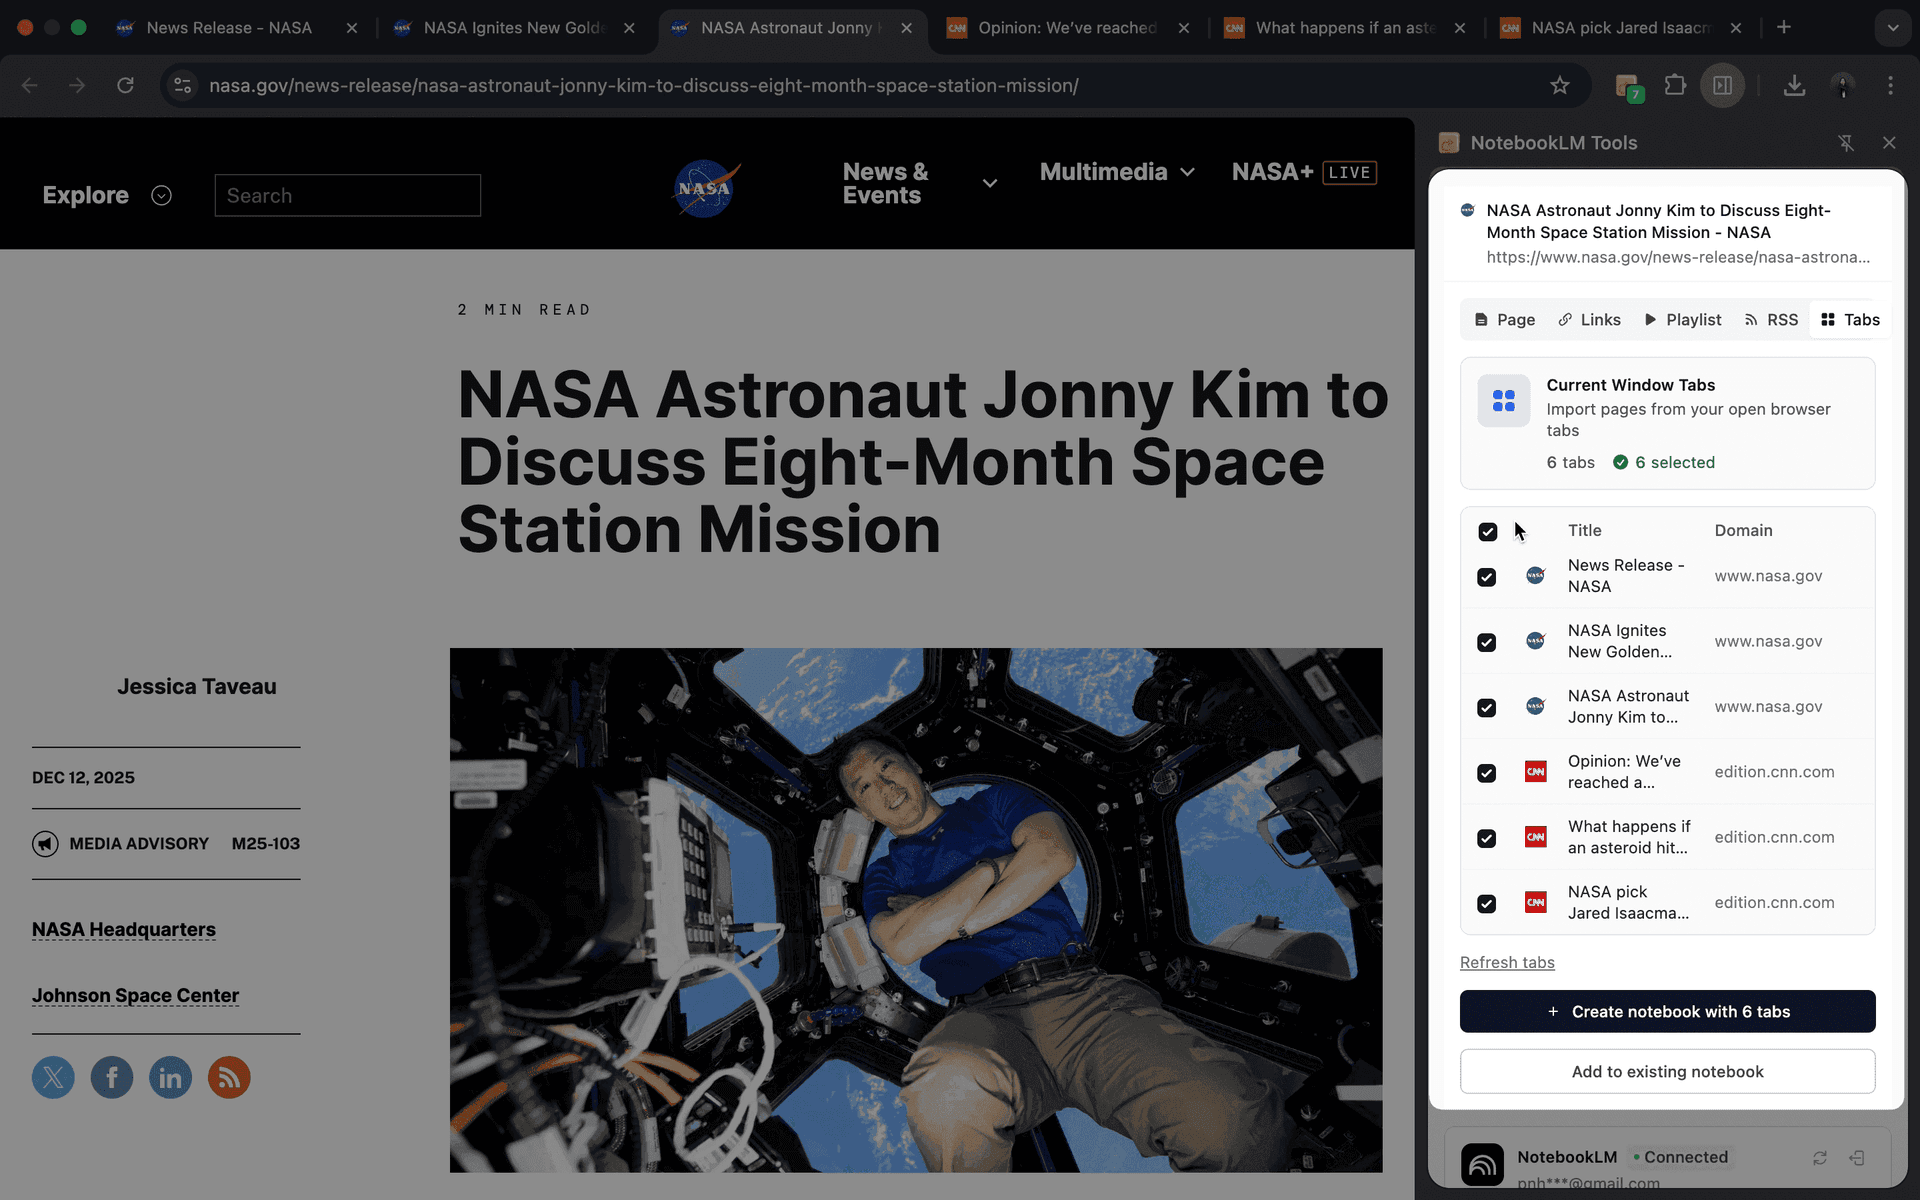
Deep research usually doesn't happen one page at a time. It happens across many tabs — articles, references, search results, and background reads all open at once.
The Tabs feature lets you import multiple open pages from your current browser window in a single step. Instead of revisiting each page or saving sources one by one, you can review everything you already have open, select what matters, and send it into your notebook at once.
This is especially useful at the end of a research session, when you've already done the reading and want to capture your findings without disrupting your flow. Tabs import turns scattered browsing into a clean, organized snapshot of your work — ready for analysis in NotebookLM.
#06. NotebookLM's Native "Add Source" Flow
Not every source comes from browsing — and not every source needs the extension.
Sometimes you already know exactly what you want to add: a specific URL, a block of text, or a file you already have on disk. For those moments, NotebookLM's own Add source dialog is still the right tool. It's built into NotebookLM itself (not part of the extension's import workflows above) and lets you add one source at a time directly from the notebook.
Think of it as the baseline the extension's workflows sit on top of: the extension handles bulk, capture, and automation; NotebookLM's native flow handles single, intentional additions. Use whichever fits the moment.
Import a Whole Website Hierarchy
Sometimes a single page isn't enough — you want the entire site structure inside NotebookLM. Think documentation sites, multi-chapter guides, company blogs, research wikis, or government portals where each sub-page builds on the last. Importing just the landing page loses most of the signal; you need the hierarchy.
The most reliable way to import a whole website hierarchy into NotebookLM is bulk URL paste. Once you have the list of URLs you want (site map, docs index, or a manually curated set of sub-pages), you can paste all of them into the import dialog at once — NotebookLM Tools will process each URL and add it as an individual source. Note that sources in a notebook are a flat list — to keep the site's hierarchy legible, group the imported URLs into source folders after import.
A practical workflow looks like this:
- Step 1: Open the site's
/sitemap.xmlor docs index and copy the list of URLs you care about. - Step 2: Clean the list — drop nav-only pages, duplicates, and anything outside the section you're researching.
- Step 3: Use bulk URL paste in NotebookLM Tools to import the cleaned list in one action.
- Step 4: Use tags or source folders to group the imported pages so the site's hierarchy is still legible inside your notebook.
Bulk URL paste turns what would otherwise be one-by-one source additions into a single batch — especially valuable when you need to query an entire knowledge base as a single corpus.
サイト全体の読み込みについて (Importing entire website hierarchies — note for Japanese readers): The bulk URL paste method above is the recommended way to import a full website hierarchy ("webサイト 階層" / "サイト全体読み込み") into NotebookLM. Collect the URLs from the site's sitemap, paste them in bulk, and NotebookLM Tools will import each page as a separate source — giving you the complete site structure inside one notebook without crawling each page manually.
For the broader feature context, see the bulk import features overview.
Importing NotebookLM sources the way research actually works
Importing sources shouldn't feel like a separate task — it should feel like a natural extension of how you already research.
Whether you're quickly saving a page, collecting links, importing multiple tabs after a deep reading session, keeping a notebook updated with RSS, or intentionally adding curated sources by hand, NotebookLM Tools is designed to adapt to how you actually work, not the other way around.
If you want to see all of these import methods in action, I've put together a full YouTube demo walking through real-world scenarios step by step.
Watch the demo here:
If you'd like to try the workflows yourself, you can install the free extension in seconds:
NotebookLM Tools - Chrome Web Store
Thanks for reading — and thanks for building smarter research workflows with NotebookLM.
Previous in series: NotebookLM Tips #2: Staying Focused in Multilingual Research — Work across multiple languages without breaking your flow.
Next in series: NotebookLM Tips #4: Turn Audio into a Real Podcast Player — Transform scattered NotebookLM audio into a proper listening experience.
Trusted by 90,000+ NotebookLM users
Related articles
Add Web Pages to NotebookLM with a Right-Click (7 Context-Menu Tools)
Import any web page into NotebookLM straight from a right-click. Seven context-menu actions capture pages, selections, and links as you browse — no copy-paste, no tab switching.

How to Add the Current Tab to NotebookLM
Add the current browser tab to NotebookLM without copy-pasting the URL. Capture any webpage as a source using the NotebookLM Tools Chrome extension.
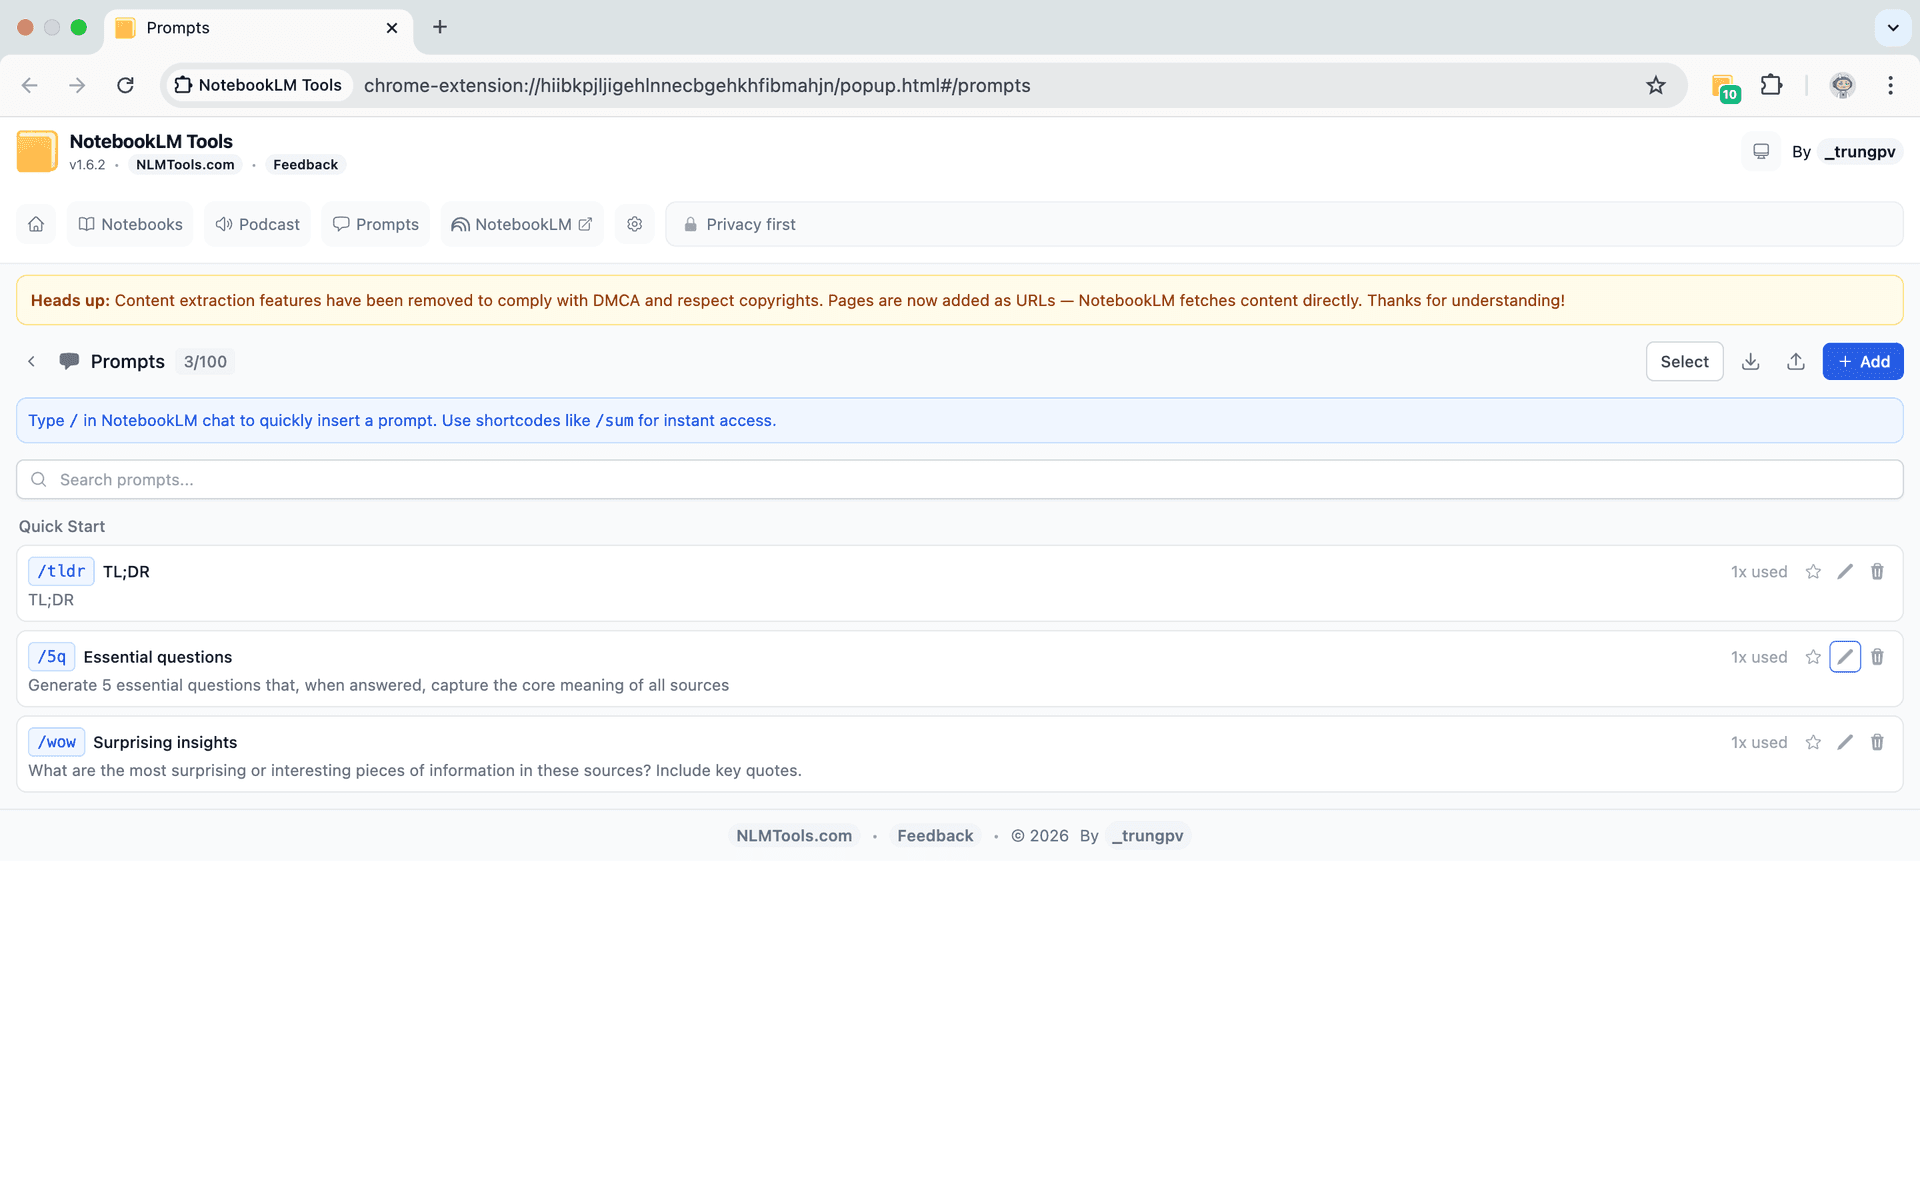
NotebookLM Custom Instructions vs Saved Prompts (Slash Commands)
NotebookLM's custom instructions set one standing prompt per notebook. For a library of 100 reusable prompts with /slash commands, here's the free setup.