NotebookLM Custom Instructions vs Saved Prompts (Slash Commands)
Enhance your NotebookLM experience with our free browser extension.
View plans
Short answer: NotebookLM now has custom instructions — one standing directive (up to 10,000 characters) you set per notebook to shape every response. What it still doesn't have is a prompt library: a way to save the twenty prompts you actually reuse and drop any of them into the chat on demand. The free NotebookLM Tools extension adds exactly that — save up to 100 prompts and trigger any of them instantly with /slash commands. This guide covers when to use which, and how to set both up.
Custom Instructions vs Saved Prompts: What's the Difference?
NotebookLM's native custom instructions (open a notebook's chat settings and choose the configure option) let you write one instruction of up to 10,000 characters that frames every answer in that notebook — a role ("act as a peer reviewer"), a tone, or a default output format. It's powerful, but it's a single standing directive per notebook: it can't hold your "summarize in 5 bullets" prompt, your "extract all statistics" prompt, and your "build a timeline" prompt at the same time.
A saved prompt library solves the other half of the problem:
| Custom instructions (native) | Saved prompts (NotebookLM Tools) | |
|---|---|---|
| Scope | One per notebook | Up to 100, across all notebooks |
| Applied | To every response automatically | On demand, per question |
| Best for | Role, tone, output format | Reusable task prompts |
| Trigger | Set once in chat settings | Type / in the chat input |
They work best together: set a custom instruction for the notebook's standing context, then use slash commands to fire task-specific prompts without retyping them.
Why Saved Prompts Matter
Research workflows in NotebookLM tend to follow patterns. You ask similar types of questions across different sources, different notebooks, and different projects.
Without saved prompts, you face:
- Wasted time retyping or copy-pasting the same instructions
- Inconsistent phrasing leading to inconsistent AI responses
- Lost prompts — you remember writing a great prompt last week, but can't recall the exact wording
- Reduced experimentation — when trying a new prompt requires effort, you default to simpler, less effective ones
Saved prompts solve all of these problems by making your best prompts persistent, organized, and instantly accessible.
How Saved Prompts Work
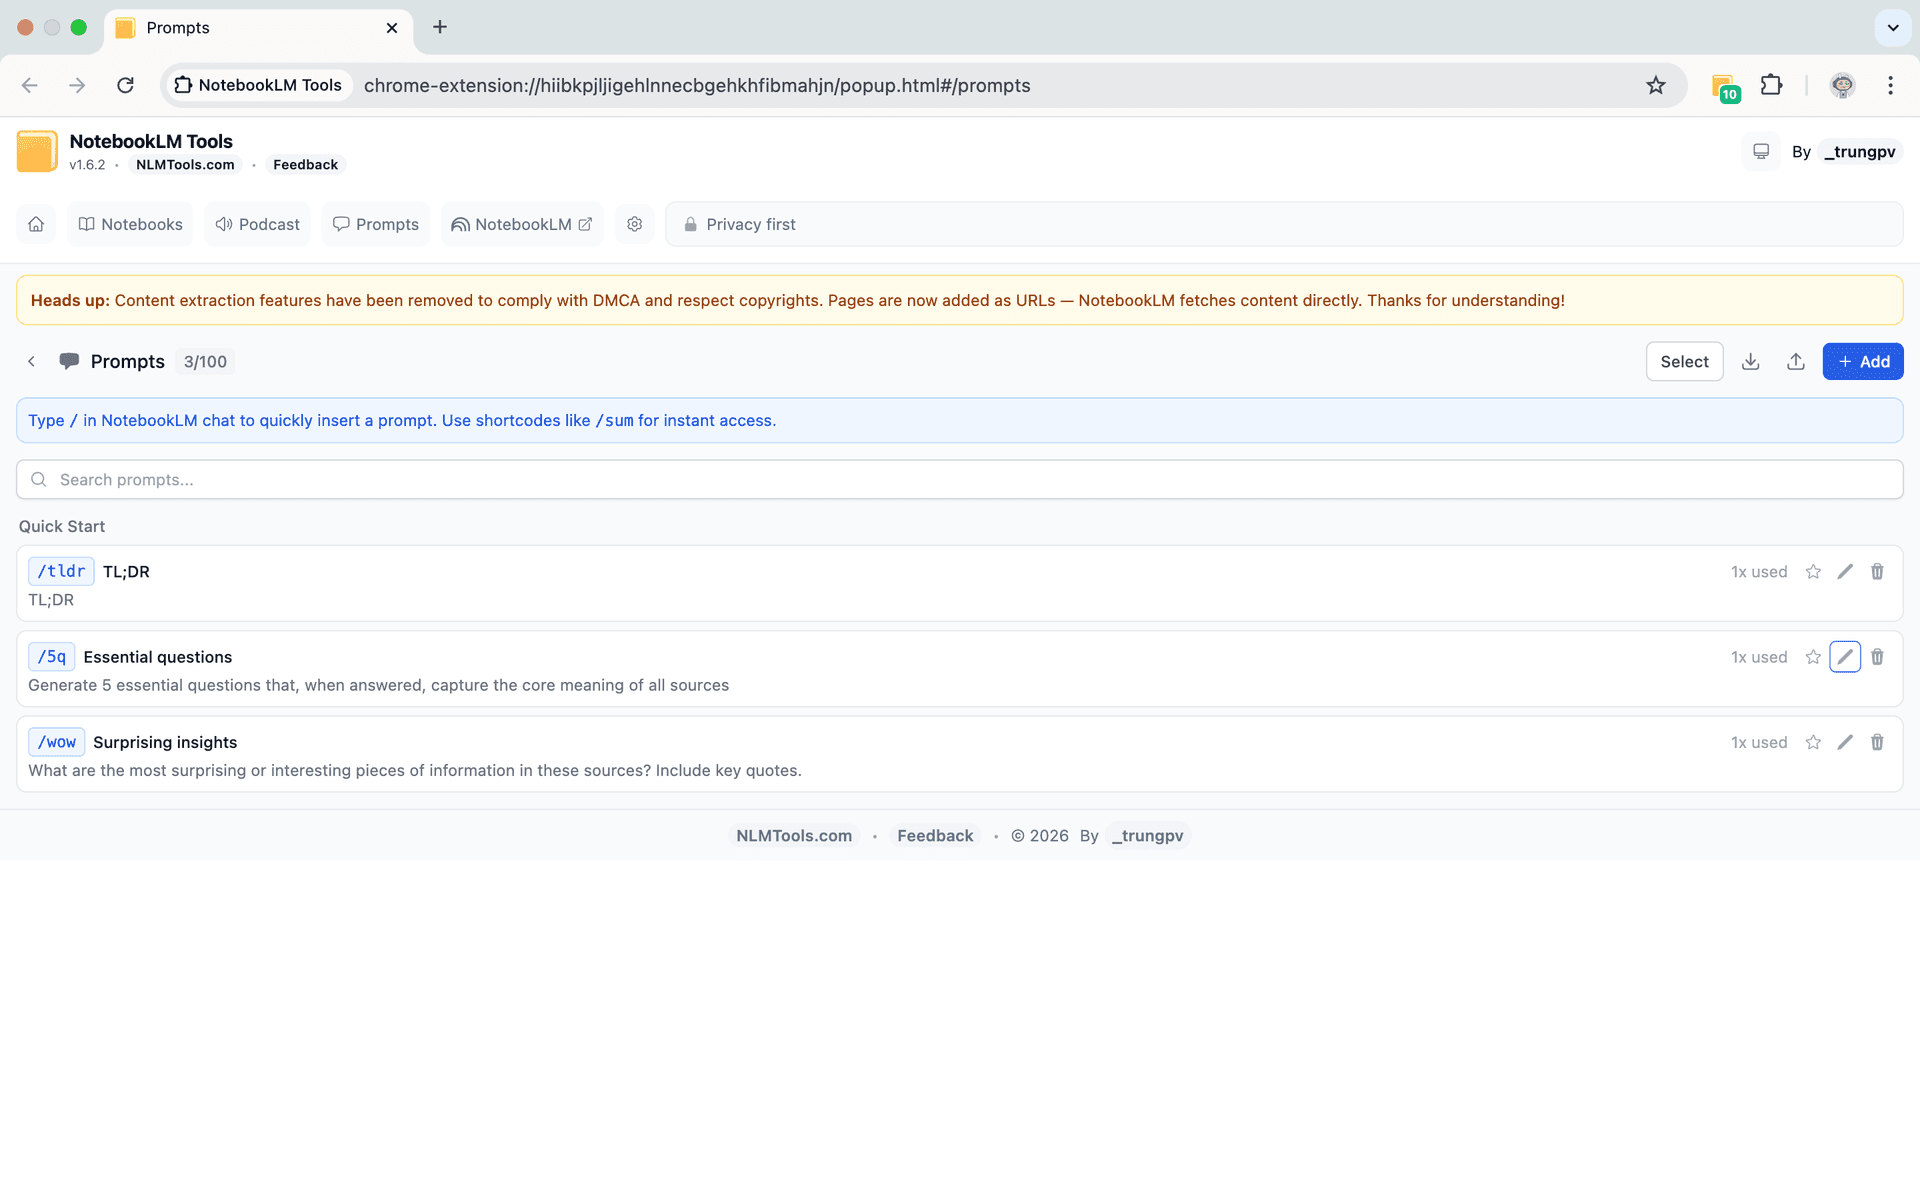
Saving a Prompt
To save a prompt, open the NotebookLM Tools sidebar or popup and navigate to the prompts section. Click the add button, give your prompt a name, and write the full prompt text.

Each prompt has:
- A name — a short, descriptive label (e.g., "Summarize Key Points")
- The prompt text — the full instruction that will be sent to NotebookLM
- A category (optional) — for organizing prompts into groups
You can save up to 100 prompts, giving you plenty of room to build a comprehensive library.
Using Slash Commands
Once saved, you can trigger any prompt by typing a slash command in the NotebookLM chat input.
Start typing / and a menu appears showing your saved prompts. Select the one you want, and the full prompt text is inserted into the chat — ready to send.
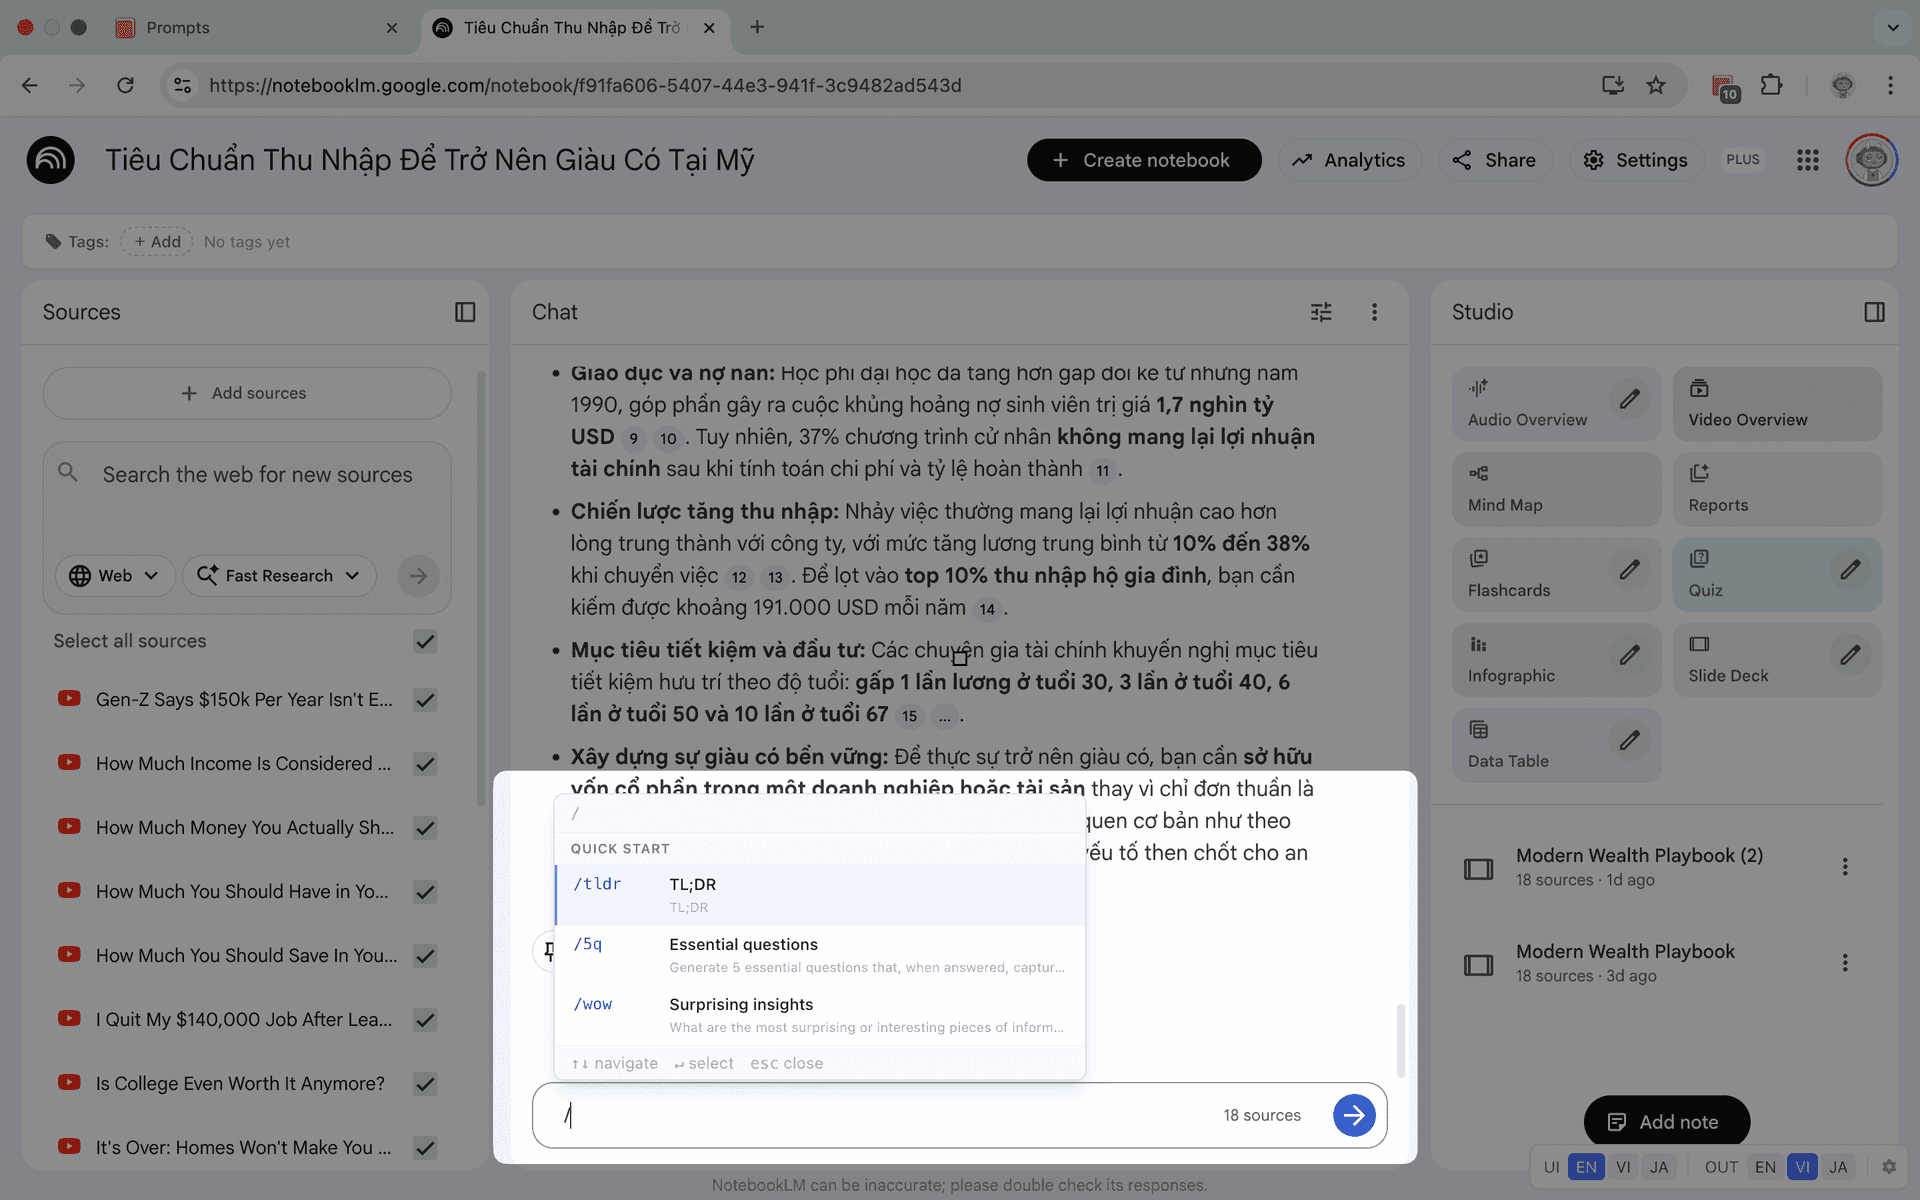
This turns a multi-step process (remember the prompt, type it out, verify the wording) into a single action: type /, select, send.
Organizing with Categories
As your prompt library grows, categories help you find the right prompt quickly. You might organize them by:
By research phase:
- Discovery — prompts for initial exploration and summarization
- Analysis — prompts for comparison, critique, and evaluation
- Synthesis — prompts for combining insights and generating conclusions
By task type:
- Summarization
- Comparison
- Extraction
- Brainstorming
- Fact-checking
By subject area:
- Literature Review
- Market Research
- Technical Analysis
- Content Creation
Categories are flexible — use whatever grouping makes your prompts easy to find.
Step-by-Step Setup
Step 1: Install NotebookLM Tools
Install the NotebookLM Tools extension from the Chrome Web Store if you haven't already.
Step 2: Identify Your Repeated Prompts
Before saving prompts, think about the questions you ask most often in NotebookLM. Write down 5-10 prompts you find yourself retyping regularly. These are your first candidates.
Step 3: Create Your First Prompts
Open the prompts manager and add each one. Give each a clear, descriptive name — you'll be searching through these later, so specificity helps.
Step 4: Test with Slash Commands
Open any NotebookLM notebook, click into the chat input, and type /. You should see your saved prompts appear. Select one and verify it inserts correctly.
Step 5: Refine Over Time
After using a saved prompt a few times, you'll often notice ways to improve the wording. Edit your prompts as you learn what produces the best results from NotebookLM's AI.
Prompt Engineering Tips for NotebookLM
NotebookLM's AI responds differently depending on how you phrase your instructions. Here are tips for writing prompts that consistently produce good results:
Be specific about the output format. Instead of "summarize this," try "Provide a summary in 5 bullet points, each one sentence long, focusing on methodology and key findings."
Reference sources explicitly. When you have multiple sources selected, tell the AI which ones to focus on: "Based on Source 1 and Source 3, compare the authors' positions on X."
Ask for structured responses. Prompts like "Create a table comparing X and Y across these dimensions: A, B, C" produce more useful outputs than open-ended questions.
Include constraints. "In under 200 words, explain..." or "Using only information from the selected sources, describe..." helps keep responses focused and grounded.
Chain prompts for complex analysis. Save a sequence of related prompts — first one summarizes, second one critiques, third one synthesizes. Run them in order for deeper analysis.
Use role framing. "As a peer reviewer, identify three weaknesses in the argument presented in this source" can produce more critical and useful responses than a generic "analyze this."
Example Prompt Library
Here are starter prompts worth saving:
| Name | Prompt |
|---|---|
| Quick Summary | Summarize the key points of this source in 5 bullet points. |
| Compare Sources | Compare and contrast the main arguments across the selected sources. Present findings in a table. |
| Extract Evidence | List all specific data points, statistics, and evidence mentioned in this source. |
| Identify Gaps | What topics or questions are NOT addressed by the selected sources? |
| Explain Simply | Explain the main concept of this source as if you're teaching it to someone with no background in the field. |
| Counter Arguments | What are the strongest counter-arguments to the positions taken in this source? |
| Timeline | Create a chronological timeline of events or developments mentioned across the selected sources. |
| Action Items | Based on the selected sources, what are the most important next steps or recommendations? |
Save these as a starting point, then build on them as your workflow develops.
Combining Prompts with Other Features
Saved prompts become even more powerful when combined with other NotebookLM Tools features:
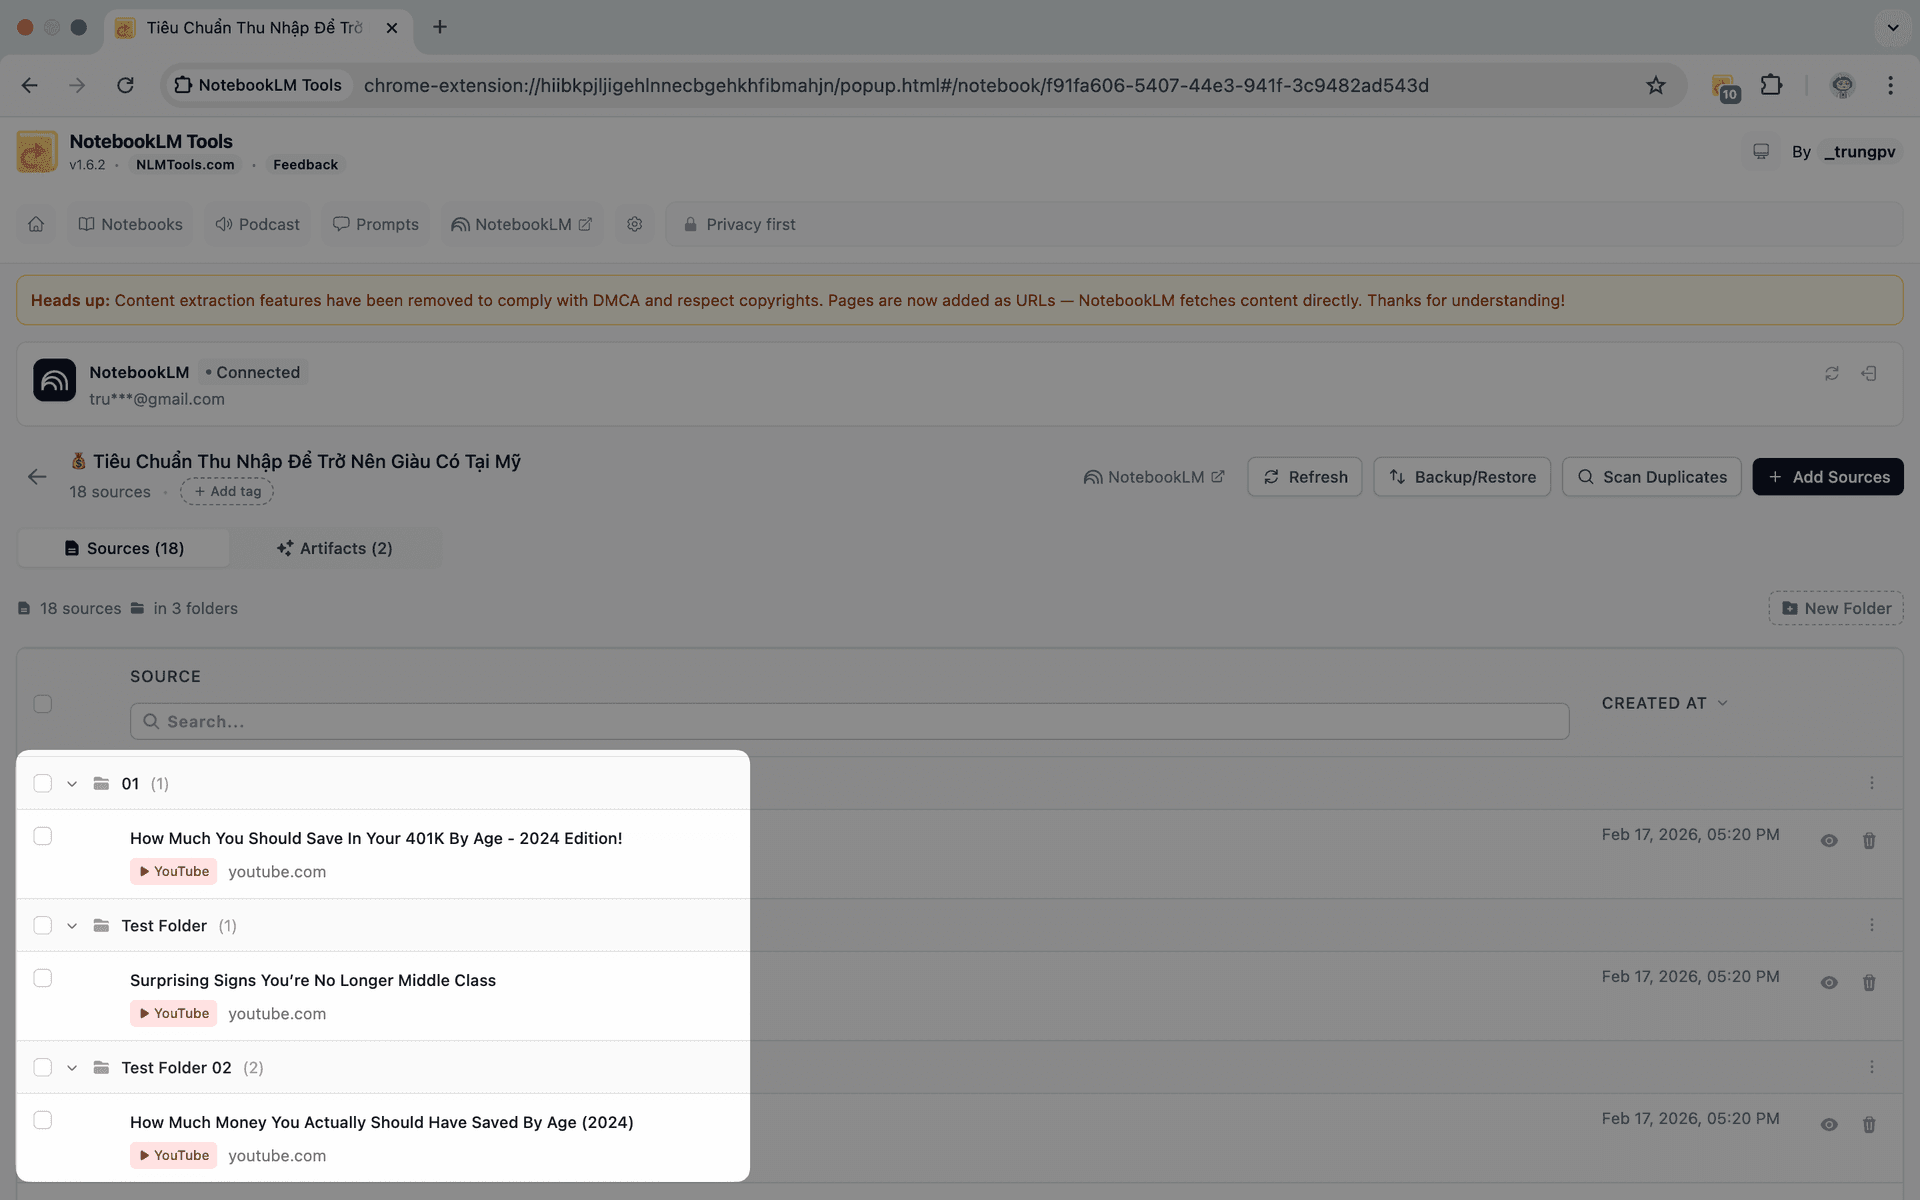
- Source folders — Organize your sources into categories, then use targeted prompts against specific folder groups for more focused analysis.
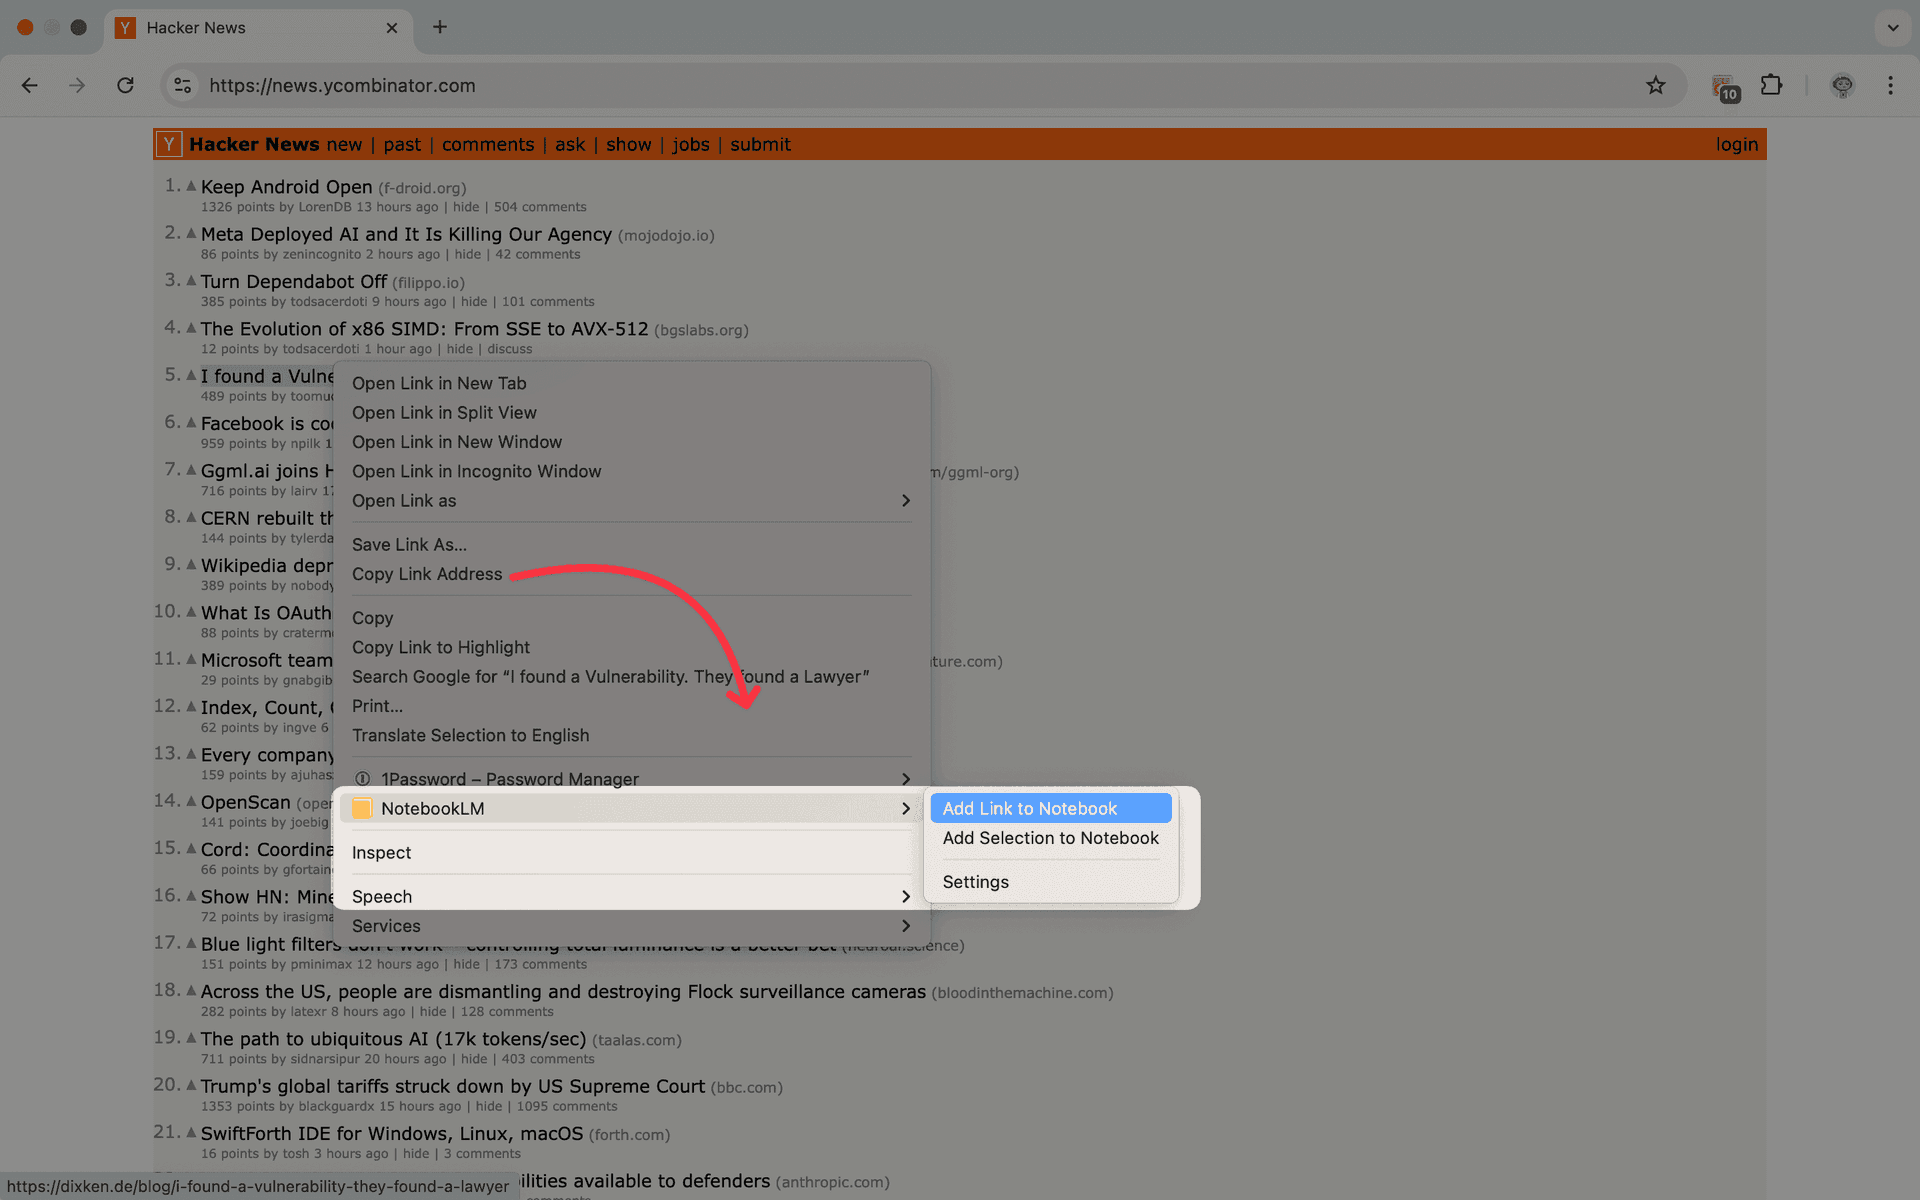
- Right-click import — Add web pages instantly while browsing, then run saved analysis prompts against the fresh content.
- Source freshness — Keep sources up to date so your prompts always run against the latest information.
Frequently Asked Questions
Does NotebookLM have custom instructions?
Yes. Open a notebook's chat settings and use the configure option to add a custom instruction of up to 10,000 characters. It shapes every response in that notebook. It complements — but doesn't replace — a saved prompt library, since you only get one standing instruction per notebook.
How many prompts can I save?
You can save up to 100 prompts. This is per-profile, so your prompt library is available across all your NotebookLM notebooks.
Can I edit a saved prompt?
Yes. Open the prompts manager, find the prompt you want to change, and edit it. Your changes apply immediately — the next time you use the slash command, it will use the updated text.
Do slash commands work in the NotebookLM chat input?
Yes. Slash commands are triggered directly in the NotebookLM chat input field. Type / and your saved prompts appear as suggestions.
Can I share prompts with teammates?
Currently, prompts are stored locally in your browser profile. To share, you can export the prompt text and share it manually with collaborators.
Build Your Prompt Library
The best NotebookLM users aren't just good at finding sources — they're good at asking the right questions. Saved prompts let you capture your best questions once and reuse them forever.
Install NotebookLM Tools, save your first few prompts, and start building a library that makes every research session faster and more consistent.
Explore the saved prompts feature to see slash commands in context, or browse the full feature list.
Related articles:
- How to Organize NotebookLM Sources with Folders — Group and categorize your sources for faster navigation.
- Right-Click to Add Any Web Page to NotebookLM — Capture sources while browsing without breaking your flow.
- NotebookLM Tips #4: Turn Audio into a Real Podcast Player — Transform scattered audio into a proper listening experience.
- NotebookLM Tips #3: All the Ways to Import Sources — Every method for getting sources into NotebookLM.
Trusted by 90,000+ NotebookLM users
Related articles
Add Web Pages to NotebookLM with a Right-Click (7 Context-Menu Tools)
Import any web page into NotebookLM straight from a right-click. Seven context-menu actions capture pages, selections, and links as you browse — no copy-paste, no tab switching.
Can You Create Folders in NotebookLM? Yes — Here's How (2026)
NotebookLM has no built-in folders, but you can add them in seconds. Create up to 50 drag-and-drop source folders per notebook with a free Chrome extension.
How to Import Sources into NotebookLM (Every Method, 2026)
Every way to import sources into NotebookLM — popup captures, right-click, RSS feeds, YouTube playlists, and bulk tab imports with the free NotebookLM Tools extension.